
- ƒ/3.2
- 60.0 mm
- 1/160
- 1000
- Flash (off, did not fire)
- Show EXIF
Original article and pictures take s.yimg.com site

It’s never too early or too late to set goals for your weight loss.
If you are looking to set a weight loss goal and are considering the 17 Day Diet as a method to reach your goal, here is a 10-point checklist to help you get started, plus a few extra bonus points!
Get a jumpstart on the 17 Day Diet with my quick start guide. I’ve boiled down all 531 pages of The 17 Day Diet Book in my free 24-page guide. I give you an overview of the diet by cycle, best practices for the Transitional Day Fast, a complete food list for each cycle, a weight loss goal chart and more. Sign up for your free 17 Day Diet Plan PDF guide now.
By formally committing to the 17 Day Diet, this signed contract will help keep yourself accountable and successful. (grab your free weight loss contract download)
I run a free private Facebook group with over 6700 members (and climbing). This is a special place to get support from other like-minded individuals who are on the same journey as you. Join for recipe swaps, quarterly weight loss challenges and encouragement in a judgment-free group. Request to join my group now.
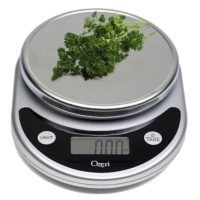
You’d be surprised how many times you might be shy of pound by one or two ounces. It can get very discouraging not seeing the scale move as quickly as you’d like it to. So if you get a scale that measures in .2 pound increments, you’ll see every ounce of progress along the way! (here’s a great scale I use)
There’s something special about putting pen to paper that actually helps you stay on track. I have both a one-page simple food journal (you can download that here) or I now have published a paperback food journal that not only allows you to keep track your food by cycle, but includes daily prompts for affirmations, gratitude journaling, and more. You can check out a copy of my Simply Me daily food journal on Amazon.
Remember, every ounce counts! If you’re the type of person who needs to keep track of your weight loss daily, then by all means, you need a weight loss tracker. Not only is my one-page tracker perfect for keeping track of your weight loss, but it’s also keeping track of your inches, too. Remember the scale is not the only indicator (download your weight tracker here) or check out my Simply Me daily food journal on Amazon that also allows you to keep track of your weight and inches lost.
Cardio is great for weight loss, but a little bit of strength training with your routine will really set you up for great results. Use a pair of dum bells for your 17 Day Diet walking workouts (to maximize caloric burn). Start small and go for 2 to 3 pound weights — you’ll be surprised at how well they work, even when they don’t weight that much! (here are some great dumbbells here).
When it comes to weight loss, planning ahead is really your #1 key to success. Plan your meal plans and your grocery list ready a week before you’re ready to start your diet. This will give you a quick head start and help you become more successful. (Read this blog post for some helpful ideas on how to prepare ahead with meal plans and recipes.)
Getting fit and losing weight is more fun when you can do it with someone you like and a friend that holds you accountable. You can join my free online support group and grab an accountability partner to help you stay motivated.
You’re the average of the 5 people you spend your most time with. Make sure you’re spending time with people who uplift you and support you every step of the way. Most importantly, since you spend 100% of your time with yourself, make sure you have a positive mindset.
If you’re feeling a bit overwhelmed and don’t know quite where to start, get a little extra help — consider purchasing one of my awesome meal plans. If you need help with Cycle 1, then check out my step-by-step meal plan called C1 Slim Down™.
If you need a bit more extra help with all cycles of the 17 Day Diet, take a look at Simple N’ Lean 17™. Both of these kits including meal plans, recipes, shopping lists, and some really cool bonus gifts!
If you’re looking for recipes only, you can check out my free collection of 17 Day Diet recipes or browse my shop for my recipe books for cycle 1.
If you’re a busy mom tired of cooking two different meals (one for you and the other for your family) or just too tired to cook from your long day at work, here’s a WONDERFUL solution for you!
BistroMD has a delicious AND affordable 17 Day Diet Meal Delivery Service. All food is 17 Day Diet approved, prepared using quality ingredients, frozen fresh and delivered to your door each week. You can check out more information on my review of the BistroMD 17 Day Diet Meal Delivery Service.
FREE CHECKLIST DOWNLOAD: Click here to save a copy of your own 17 Day Diet Checklist

This 17 day diet blog recipe is super easy. I have this every morning for breakfast during Spring and Summer when my body is naturally craving something lighter, yet satiating! It satisfies just over 1 probiotic serving and 1 fruit for the day.
1 Cup Plain Fat Free Yogurt
4-5 large strawberries, sliced
1/4 cup fresh blueberries
3 tsp ground flax seed (optional)
1/2 tsp sweetener
Mix all together and serve cold. During summer months, try different berries such as blueberries, blackberries or raspberries.
On Cycle 3, add a sprinkling of your favorite bran cereal (such as Kashi Go Lean) for that added crunch.

I came up with this recipe about seven or eight years ago, when I tried making regular mayonnaise for the first time. Being a little worried about the mixture not emulsifying I whisked the oil in really, really slowly. The result? A very, very thick mayo. So I thinned it with yogurt and I haven't looked back. Because it's a little thinner than regular mayo it makes a great dipping sauce, as well as being useful for the usual mayo purposes. Of course it's much healthier than regular mayonnaise, but even if you don't care about health there's a creaminess and lightness to this that you may prefer. It's also very, very versatile, as you'll see.
Put the egg yolk and mustard in a bowl and whisk together.
Very, very gradually drizzle in the extra virgin olive oil, whisking all the while.
(It's imortant to go very slowly at first, once you've got 1/3 to 1/2 of the oil in there you can go a bit faster)
Whisk the yogurt in. There's no need to go slowly with this part.
Add salt and pepper to taste.
Because the yogurt is naturally sour there's no need to add lemon juice or vinegar as you normally would with a mayonnaise, unless you're using it for tartar sauce (see below), in which case you may want it a bit more tart.
Variations:
1. Add some blue cheese, and maybe a few chopped chives, and you've got a blue cheese dip, delicious with chicken wings (or, if you're being healtier, with spicy grilled chicken breast strips)
2. Add chopped pickles and capers, and some chopped dill if you like, and you've got tartar sauce. Or you can mix it with tuna, for a delicious tuna salad / sandwich.
3. Add more mustard and a bit of honey and you've got a honey mustard dressing for coleslaw.
4. Add chopped anchovies, minced garlic and grated parmesan and it's caesar dressing.
5. Add some wasabi and you've got a wasabi mayo that goes really well with grilled salmon or tuna
6. You can also add reyhydrated and minced chipotle peppers, pureed roasted peppers, chopped herbs, pureed roasted tomatoes...

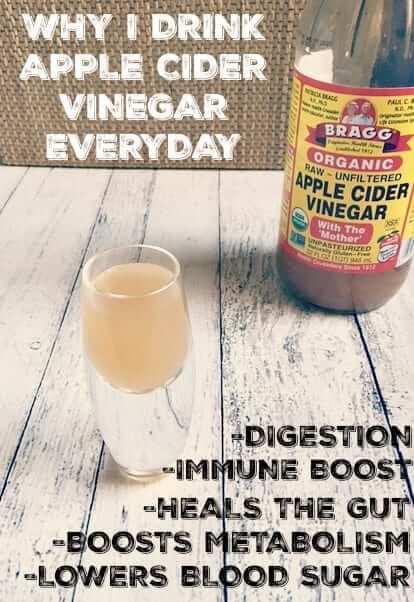
I usually start each morning with the healthiest shot ever, which is made with apple cider vinegar and other incredibly healthy ingredients. A lot of people have a hard time ingesting ACV because let’s face it – that’s some sour sh*t. But when mixed with ingredients like lemon, raw honey and wrinkle + cellulite reducing collagen, it’s actually pretty dang good.

It’s incredibly easy to make a batch of this every Sunday and take a shot of it once a day throughout the week. And I highly recommend giving it a try, because apple cider vinegar is incredibly healthy. Before delving into the benefits of apple cider vinegar, I’d like to emphasize that I only use Bragg’s Apple Cider Vinegar. Bragg’s ACV is “with the mother” which is the dark, cloudy substance you may see floating around in the bottle. It’s presence indicates that the best part of that apple has not been destroyed via heat or filtration. Majority of vinegars on the market do not contain this, and are devoid of the enzymes and minerals that come with the mother. It’s the most nutritions part of ACV and is incredibly beneficial for digestion. Bragg’s may not be the only ACV company that provides this, but they’re the only one I know of. Now, here’s why I drink apple cider vinegar everyday!
Some of the worst health advice I’ve heard is to drink a large glass of water either before or with meals to make you feel fuller. This is incredibly stupid for two reasons. Hunger is the brain’s way of signaling that the body needs nutrients. Water does not contain nutrients, so drinking a bunch of water before a meal is useless for eating less. Second, water dilutes stomach acid, which makes it more difficult to digest food and absorb the nutrients from it.
However, regular intake of apple cider vinegar ensures that is stomach acid strong. Many people have weakened stomach acid due to modern day diets rich in sugar, vegetable oils, refined carbohydrates and junk food. You’re not just what you eat – you are what you absorb from what you eat. That salad isn’t going to be very healthy if your body can’t absorb the nutrients from it. Because ACV improves stomach acid, it also improves digestion (source). It’s a good idea to drink about a tbsp of of ACV in a shot glass full of water about 20-30 minutes prior to a meal. This will improve digestion greatly.
And because it improves digestion, it also improves the metabolism. When I’m referring to metabolism, I’m actually referring to the rate at which the body breaks down, digests and absorbs food to turn into energy. If digestion is sluggish, this will slow down the metabolism and lead to a whole list of issues. But because ACV improves digestion, it also improves the metabolism. It’s also rich in malic acid, which improves fat metabolism.
Apple cider vinegar contains acetic acid and malic acid, both of which are antibacterial and anti-fungal. However, it does not kill off beneficial bacteria but instead the harmful bacteria found in the gut.
You’ve probably heard that majority of the immune system is located in the gut. This is true. A healthy gut is a healthy immune system. Because ACV is great for digestion as well as killing off harmful bacteria, it makes it a
potent immune booster. Not to mention that it contains a variety of acids, specifically malic acid, which is antibacterial and anti-viral.
We are constantly bombarded with toxins, chemicals and free radicals. This can lead to premature aging, cancer and degenerative disorders. Apple cider vinegar contains beneficial antioxidants which reduce the effects of free radicals.
If you have issues with blood sugar regulation, or even if you’re diabetic, it may be time to look into apple cider vinegar. Even the American Diabetes Association has studied the beneficial effects of ACV,
“These data indicate that vinegar can significantly improve postprandial insulin sensitivity in insulin-resistant subjects. Acetic acid has been shown to suppress disaccharidase activity (3) and to raise glucose-6-phosphate concentrations in skeletal muscle (4); thus, vinegar may possess physiological effects similar to acarbose or metformin.”
Studies have shown that the acetic acid in ACV suppresses the accumulation of body fat and liver lipids (which is particularly great for anyone who suffers from fatty liver disease).

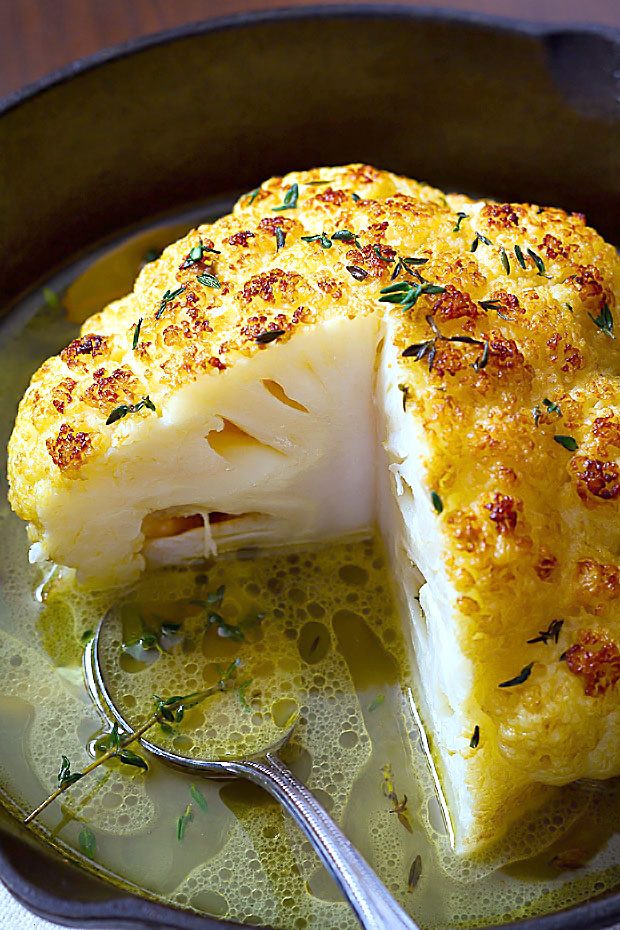
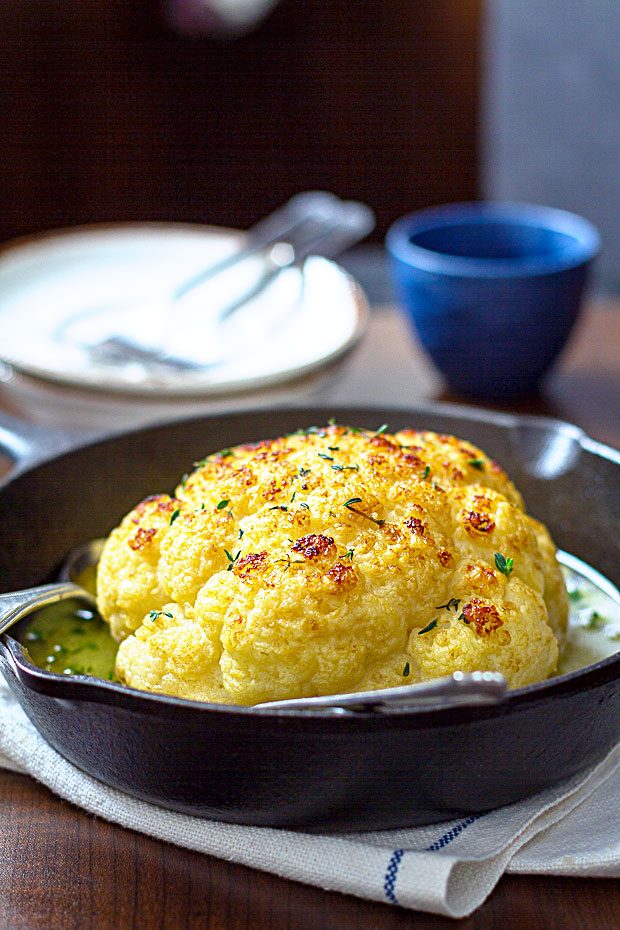
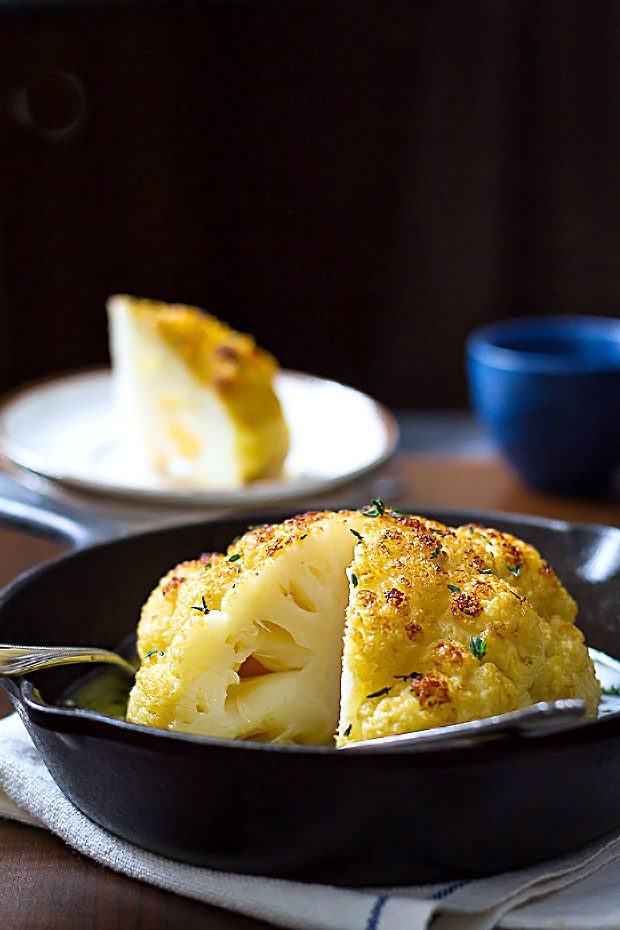
Whole Roasted Cauliflower Recipe – A lovely LOW CARB side or a VEGETARIAN main course! Crisp, tender, and SO delicious, this is your new favorite way to eat cauliflower.

Want a printer-friendly version of the recipe with full nutritional values?


Download your Whole roasted cauliflower with butter sauce recipe card with nutrition info!
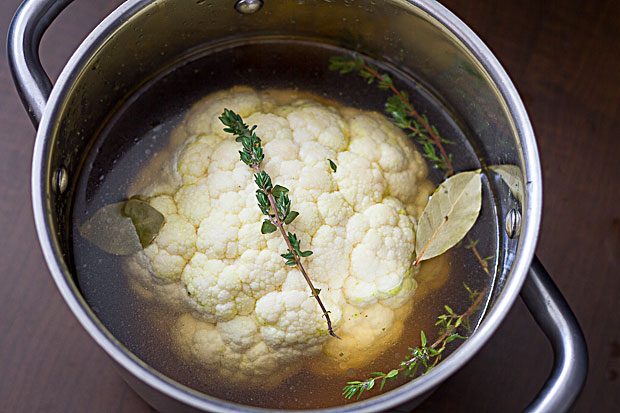
1. Preheat your oven to 400ºF (200°C). Trim the bottom of the cauliflower and remove all the leaves and the stem, but without breaking apart. Give it a quick rinse and pat dry.
2. Place the whole cauliflower in a pot and cover with stock, add fresh thyme and bay leaf. Bring to a boil and simmer for 12 minutes.
3. Drain and transfer the cauliflower head in a cast iron skillet or any oven proof pan. Ladle a little of the cooking stock over the cauliflower then drizzle with melted butter on top. Sprinkle with fresh thyme and pepper.
4. Roast in the oven for 10-15 minutes, depending on the size of your cauliflower, until golden. Baste with cooking juice from time to time. Check with a knife, if it slides in easily, then it’s cooked. You can broil for an extra 2 minutes if you want to give it a bit more color, but keep an eye on it so it doesn’t burn.
5. Remove from the oven and sprinkle with fresh thyme. Slice, and serve with an extra drizzle of the buttery cooking juices.
Note: For a smokey non-vegetarian version, add crumbled bacon on top of the roasted cauliflower.
Set the mood

Download your Whole roasted cauliflower with butter sauce recipe card to save!
You’ll receive a downloadable PDF file immediately after your purchase. It includes a picture, the ingredients list, clear instructions for the recipe, and the nutritional values. Click here to download your recipe card.

The beauty of egg cups is that they are super versatile – you can literally add any veggie combination you want and still end up with a terrific egg cup!
Here’s a 17 Day Diet compliant recipe for egg cups shared by a fellow 17dd Blog reader, Janice. Literally use the ingredients you have on hand, but if you need a starting recipe, this is the one to use!
Ingredients
1 16oz carton of egg whites plus 2 whole eggs (lightly beaten) (may use Egg Beaters)
1 chopped green onion
1 large handful cherry tomatoes, sliced (or more)
1/3 cup of frozen spinach, thawed
1 red or green bell pepper, chopped
1/4 cup shredded Parmesan cheese
Salt & pepper to taste
Directions
Preheat oven to 350 degrees F.
In a large bowl, mix all ingredients together. Pour mixture into greased muffin tins or silicone baking cups.
Bake for approximately 30-35 minutes or until toothpick comes out clean.
Note from Janice: can use cooked broccoli, sliced mushrooms, red onion, red pepper flakes…whatever you have on hand & sounds good!
Yields roughly 9 regular-sized muffin cups (up to 3 cups equal 1 serving)
Approved for all cycles

Photo courtesy of Janice B.

Hubby is the undisputed king of foodsavering. Nothing comes in this house and goes into one of the freezers without his foodsavering it – well, maybe not frozen vegetables or ice cream, but pretty much everything else! Here are some of his vacuum sealing tips and tricks:
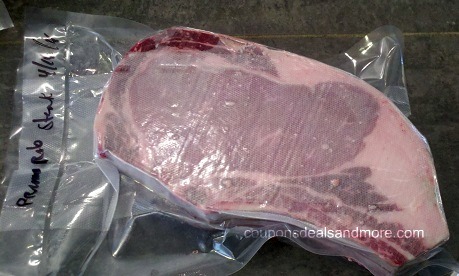
We recently made a trip to the local slaughterhouse and brought back quite a bit of meat.

So hubby hauled out the old foodsaver:

As well as the bags I bought him as a gift!

And then he choose what meat he wanted to work with.

Since these were simple steaks, it was pretty straightforward. He just place one of each into a bag, and foodsavered:

He uses one steak underneath the other to raise the steak he is currently working on to the correct height. It makes it easier to use your hands to press the button and hold the flap to the foodsaver.

The steak is labeled with date and type and now ready for the freezer.
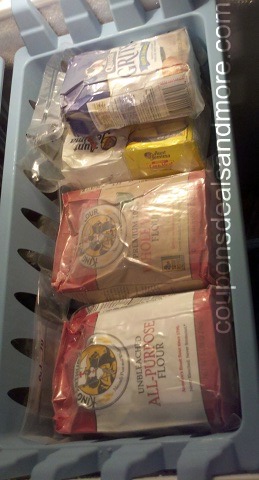
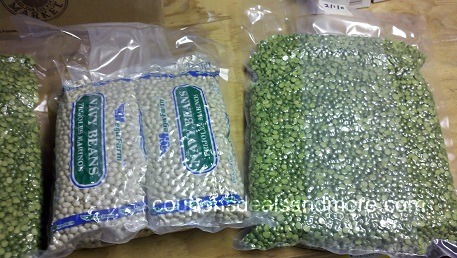
Some items hubby foodsavers regularly are:
Flour:
Beans and Peas:
Lard and Butter:

The flour, lard and butter we keep in the freezer, the beans and peas in the stockpile. Since I hate the thought of bugs, I definitely am onboard with this habit of hubby’s!
Are you a vacuum sealer devotee like my hubby? What unique ideas do you have for vacuum sealing?
Note: this post originally appeared on my old blog, Coupons, Deals and More.
• Disclosure the links in this post may be affiliate links.
• For more Recipes on Ann’s Entitled Life, click here.
• If you enjoyed this post, be sure to sign up for the Ann’s Entitled Life weekly newsletter, and never miss another article!
FOLLOW US ON:
This is a recipe I featured in my latest C1 Challenge, and it was a great hit! This recipe is a healthier version of the traditional cabbage roll. It’s acceptable for all cycles of the 17 Day Diet and is super easy to make (much easier than the traditional recipe).
Ingredients
1 pound Ground Lean Turkey (or chicken)
2 Tablespoons Olive Oil
1 Small Onion, chopped
1 teaspoon Garlic Powder
1/2 teaspoon Onion Powder
1/2 teaspoon Dried Thyme
1/4 teaspoon Ground Pepper
1/2 teaspoon Salt
15 ounce Can Diced Tomatoes
1 Small Head Small Green Cabbage – chopped
½ Cup Water
1 Cup Low-fat Mozzarella Cheese
Salt/Pepper To Taste
1 Cup Riced Cauliflower, cooked
Directions
In large pot or pan, over medium high heat, brown turkey with olive oil and onions.
Reduce heat to medium; add garlic powder, onion powder, thyme, salt and pepper and stir until well combined.
Add diced tomatoes and water to mixture and bring to a boil.
Add cabbage, cover and reduce heat to medium low. Cook 7 to 10 minutes.
While mixture is cooking, prepare the cooked riced cauliflower. In a food processor or with a grater, rice your cauliflower into rice-sized pieces. Use enough cauliflower to yield 1 cup riced.
In an un-oiled pan over medium heat, cook the cauliflower until all moisture is gone, about 6-8 minutes. Set aside.
When your meat mixture is finished cooking, cooked riced cauliflower to pot and let flavors marry for a minute or two.
Top with cheese and cover 1-2 minutes to melt.
Remove from heat and serve.
Yields 4 Servings
Approved all cycles
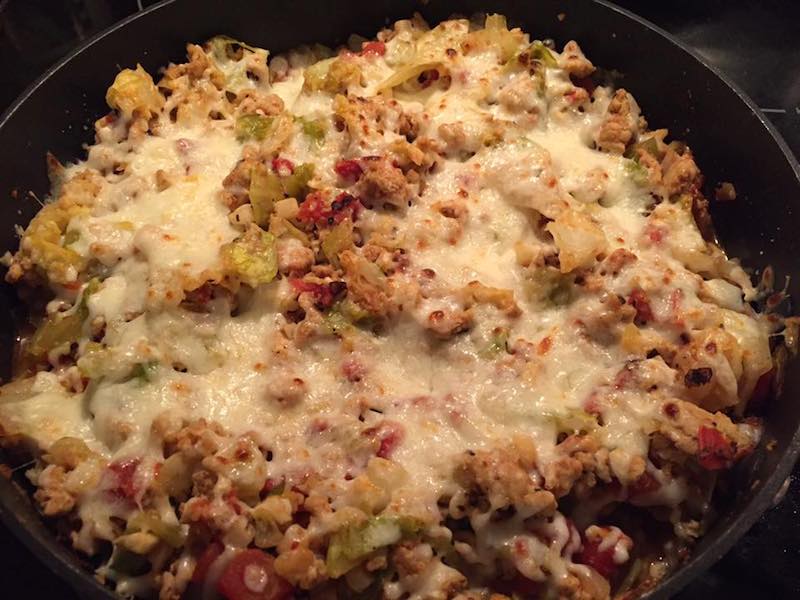
Photo Courtesy of Cari G. Follow Cari on Instagram.
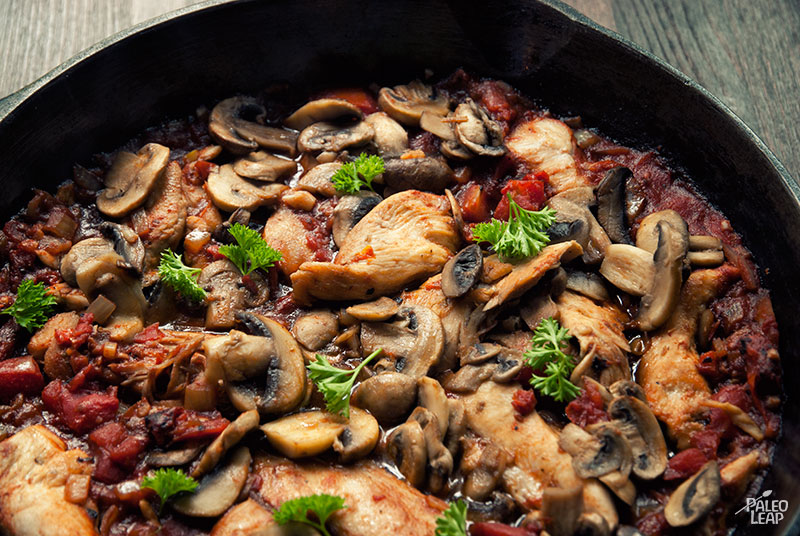
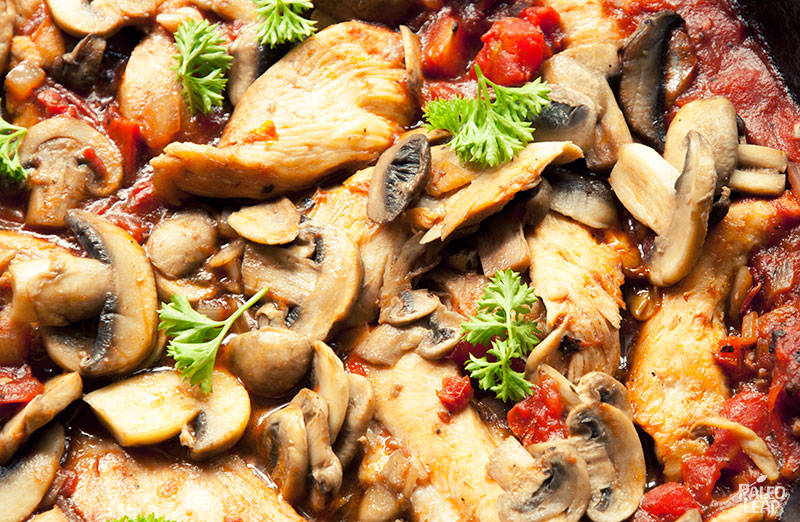
Calling all tomato-lovers! This easy weeknight dinner has it all: sun-dried and fire-roasted tomatoes to double up on that full-bodied savory flavor. Add the umami from the mushrooms and the time-honored combination of garlic and herbs, and you’ve got a surefire winning recipe, all in just a few minutes of cooking time.
The tomato-based sauce is also perfect for the meat in this recipe: chicken tenderloins are extremely lean, so cooking them in the rich sauce helps add flavor and prevent them from drying out. If you’ve never cooked with tenderloins before, they’re very easy to use. They’re essentially like little miniature breasts: extremely versatile and easy to use in pretty much whatever you want to cook (if you’ve ever eaten chicken tenders at a restaurant, you were eating the tenderloin). In fact, there’s only one real difference between a breast and a tenderloin: the tenderloin is cheaper!
With just a few minutes of prep and cook time, this recipe would be the perfect solution to a busy evening when you don’t have a lot of time to cook or wash up a huge pile of dishes. And it makes great leftovers, too, even for breakfast (imagine a bowl of all those delicious tomatoes, with a runny poached egg on top – yum!). Make a big pan, save some for later, and enjoy all the time you’re not spending in front of the stove.
SERVES: 4 PREP: 15 min. COOK: 30 min.
A savory, satisfying meal that happens to be compliant to the Seventeen Day Diet. This version is great for those of us who think meat is the most important item on a menu.
If you want to sneak a little more vegetable into the family diet, try "Stuffed Peppers with Turkey and Veggies."
Preheat oven to 350 degrees F (175 degrees C).
After washing your peppers, cut off the top and remove the core, seeds and membranes. Dice the removed tops, after discarding the stem, and set aside. Wrap the bell peppers in aluminum foil and place in a baking dish. Bake 20-25 minutes, then remove from heat.
In a skillet over medium heat, saute onion and garlic in olive oil. until the onion becomes translucent (3-5 minutes). Remove from heat.
In a large bowl, combine sauted vegetables with all remaining ingredients and stir until combined. Fill the peppers with this mixture and place in baking dish*.
Cover loosly with foil and bake for 30 mintes, then remove foil and bake uncovered for 30 minutes more, or until turkey is cooked through.
*If your peppers do not want to stand upright, cut them down the middle and fill them as though they were little pepper boats. This also allows more of the meat to be exposed to direct heat, resulting in more of that lovely, crunchy meat crust.
Serving Size: Makes 4 abundant servings.

Here’s a recipe straight out of the kitchen of MaryPat C., a member of my private Facebook group. This soup is approved for all cycles of the 17 Day Diet. Enjoy!
Ingredients
1 large Vidalia onion, peeled and diced
4 garlic cloves, minced
8 celery stalks, chopped
2 pounds carrots, peeled and sliced
1 pound ground lean turkey
8 oz packet of Frontera Green Chili Enchilada Sauce with Roasted Tomatillo & Garlic by Rick Bayless (or any enchilada sauce of your choice)
2 32 oz boxes of Low or no-sodium chicken broth
1 bunch Cilantro, chopped for recipe and garnish
Greek or Plain Yogurt for garnish (optional)
Low or non-fat cheese
Olive oil
Salt and pepper, to taste
Directions
On medium heat, add a drizzle of olive oil into a large soup pot.
Add onions, garlic, celery and carrots and sauté until onions begin to soften. Add in ground turkey and continue cooking until meat is cooked through.
Add enchilada sauce to mixture and allow flavors to merry for a few minutes.
Add chicken broth and allow to simmer for 20 to 30 minutes, or until carrots are cooked through. At the very end, add a handful of chopped cilantro to soup and allow to simmer for a few minutes.
Season with salt and pepper according to your preference.
Garnish your bowl of soup with a dollop of Greek or plain yogurt, cheese and chopped cilantro.
Yields 6 servings
Approved for all cycles.

Photo courtesy of MaryPat C. Make sure you check out MaryPat’s Facebook Page for her business, Beyond Necessity Gifts.

Here’s a recipe I developed based on very limited information I read in someone’s Instagram post. These were delicious and can be eaten on any cycle of the 17 Day Diet. Even my boyfriend loved them!
Ingredients
2 4-oz cans of White Albacore Tuna, drained
1 Tablespoon Greek Yogurt
1 egg
2-3 Tablespoons Grated Parmesan Cheese
1 Tablespoon Fresh Chives, minced
Salt and Pepper, to taste
Dash Cayenne Pepper
Wedges from 1/2 Lemon (reserve other half for sauce recipe below)
Directions
Drain tuna fish and lightly flake. Mix all ingredients together until well blended. Make four patties. In frying pan, heat 2 tablespoons Olive Oil on medium heat. Brown each side for 10 minutes.
Serve on bed of lettuce along with the Lemon Dijon Sauce and lemon wedges.
Ingredients
1/4 cup Plain Greek Yogurt
1 teaspoon Dijon Mustard
Zest from 1/2 Lemon
Juice of 1/2 Lemon
1 Tablespoon Fresh Chives, minced
Salt and Pepper, to taste
Dash Sweetener (optional)
Directions
Whisk together all ingredients. Serve over tuna cakes.
Yields 2 Servings

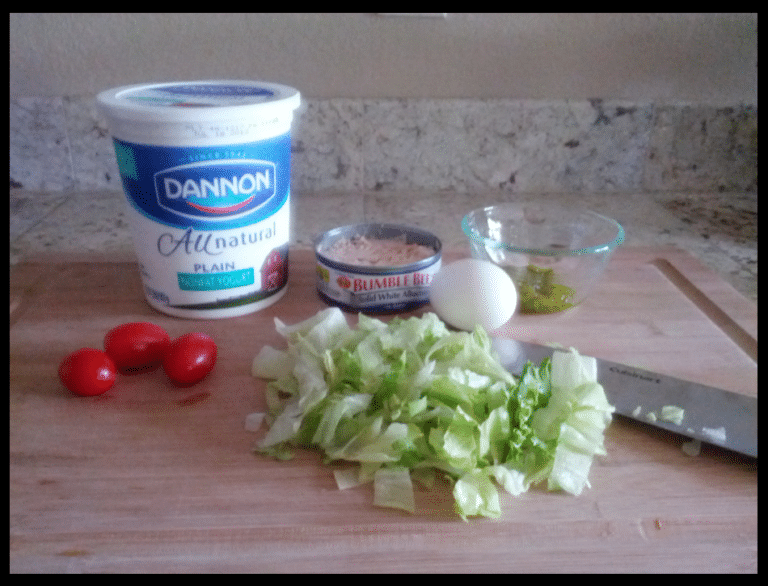
While my boyfriend made a tuna sandwich drenched in mayo, I opted for a more healthier version of the classic tuna and egg salad. Here are the ingredients I started with:
Ingredients:
1 Can Solid White Albacore Tuna (in water)
1 Tablespoon Sweet Pickle Relish
1 Heaping Tablespoon Fat Free Plain Yogurt (or more to taste)
1 Whole Egg, boiled
Handful favorite lettuce
Salt and Pepper, to taste
3-4 Cherry Tomatoes
Directions:
Drain tuna fish and add to bowl. Mix in sweet pickle relish and fat free plain yogurt. Cut up boiled egg and add to mixture. Salt and pepper to taste.
Top your favorite lettuce with the tuna salad. Garnish with 3-4 cherry tomatoes. Enjoy!
Approved for all cycles
Yields 1 Serving


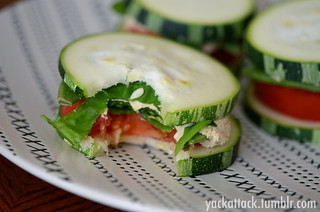
The tomatoes add just the right burst of juicy flavor in between your bites.


LoveThisPic is a place for people to come and share inspiring pictures, quotes, DIYs, and many other types of photos. The user 'Timfly' has submitted the True Friendship picture/image you're currently viewing. You have probably seen the True Friendship photo on any of your favorite social networking sites, such as Facebook, Pinterest, Tumblr, Twitter, or even your personal website or blog. If you like the picture of True Friendship, and other photos & images on this website, please create an account and 'love' it. This will save the True Friendship to your account for easy access to it in the future. We hope you enjoy this True Friendship Pinterest/Facebook/Tumblr image and we hope you share it with your friends. Incoming search terms: Pictures of True Friendship, True Friendship Pinterest Pictures, True Friendship Facebook Images, True Friendship Photos for Tumblr.

I hear the same thing time after time…..
“I am so hungry on this diet” or “I haven’t lost any weight in Cycle 1″…
OK, there are two things wrong with these statements. 1- You should NEVER feel hungry on the 17 Day Diet and 2- It’s nearly impossible NOT to lose any weight on Cycle 1.
For those who may be feeling hungry or not losing weight on Cycle 1 or 2, ask yourself a few questions:
Many times “hunger” really is our body telling us that we are dehydrated and need water.
Remember, liberal amounts of vegetables and lean proteins are one of the basic rules of Cycles 1 and 2. If you feel hungry, eat more green, leafy veggies. If you’re not losing any weight during Cycle 1, increase your protein and vegetable intake (by a lot). However, remember to increase your water intake to accomodate the increase in fiber or you may find yourself constipated!
I had a woman last year who emailed me asking why all the sudden her weight loss stopped in Cycle 1. I had her go back to her food journal to see what had changed. She discovered that because she wasn’t feeling all that hungry, she decreased the amount of protein and veggies. When she had done this, guess what happened? Her weight loss stopped. Your body gets used to not having enough calories and guess what it does? It holds onto every ounce of fat you have to keep you alive!
It’s important to eat enough calories to sustain you throughout your day, to allow your body to use this food for energy and to boost your metabolism.
Remember, liberal amounts of lean proteins and veggies in Cycles 1 and 2 for a healthier you!
Q: It seems like every week I hear about a new miracle diet. Which one is really the best?
-Rhonda W., Columbus, Ohio
This is one my favorite topics, and a question I grapple with every day in my office. To really determine the "best" diet, you have to consider your individual needs and goals. For people who are overweight, for instance, I generally recommend a low-carb or no-carb diet. But even that isn't always the best option. For someone with kidney disease, for example, a high-protein diet can be dangerous.
Don't Fall for Convenience
The common denominator of all "best" diets is a focus on whole foods, especially nutrient-dense vegetables. As one of my nutrition mentors liked to say, "Only eat food that would rot, but eat it before it does."
Much of the food (or as Michael Pollan, author of Food Rules and other books, would say, "food-like substances") found in the center aisles of conventional grocery stores has a scary-long shelf life. Food in a box is typically laden with toxic preservatives, and the inner lining of food cans generally contains BPA, a known endocrine disruptor.
When shopping for healthy options, it's important to remember that the more a food is marketed or advertised, the less wholesome it's likely to be. After all, you don't see a lot of television commercials for organic home sprouting kits, or corporate sponsorship of community gardens.
Don't fall for the lure of convenience. Taking care of yourself requires time and commitment, and it's the most important commitment you can make. I strongly recommend planning a week's worth of meals before you go shopping, and try to stick to the plan.
Go heavy on fresh produce, and make a yummy vegetable-based soup or stew and an interesting salad that will last for several servings. Center your evening meals around fresh-as-possible vegetables, and then add a little organic meat or fish. Or, if you prefer to avoid meat, pad your meals with plenty of protein-rich nuts, cheeses, eggs, or legumes.
How to Enjoy Meat
Humans are omnivores: Our digestive systems are designed to handle meat. This is where things can get tricky. Some people, especially those with type O blood, women who menstruate heavily, or athletes, feel much (much) better when they eat meat. However, there are way too many people on the planet for everyone to eat meat every day. We would wipe out our forests pasturing cows in 10 years if everyone aimed to get meat on every table, every night. It's therefore important not to lose sight of the planetary impact of our food choices.
A good compromise for meat eaters is to choose only organic or wild meat, fish, and poultry-if you have no idea where the slab of flesh came from, avoid it. And limit your intake to 2-5 servings per week.
Guide to Good Fats
Just as there are "good" proteins (organic, grass-fed) and "bad" proteins (corn-fed cows from factory farms), there are also "good" and "bad" fats. The good fats, which you should get regularly in your diet, are relatively unprocessed. Think olive oil, coconut oil, and organic butter. Avoid fats made in a lab such as margarine, usually crammed with hydrogen molecules so it won't go rancid. Hydrogenated fats assume an unnatural carbon-chain structure that renders the body's cell walls and tissues stiff and less resilient to stressors.
Polyunsaturated fish oils are readily absorbed in our small intestine and deliver healing nutrients, fuel, and building blocks for the nervous system. Saturated fats get tucked away in adipose tissue and the inner lining of arteries, and the only way to prevent atherosclerosis is to simultaneously eschew bad fats while feasting on plenty of nutrient-rich, naturally pigmented, vegetables. It's the pigments (chlorophyll, beta-carotene, lycopene, anthocyanins), fiber, and moisture content that make vegetables so awesome.
How to Deal with Carbs
Carbohydrates are the most difficult macronutrient for many of us to manage. Let's face it: We love carbs. Eating carbs gives us energy and pleasure. But we have to make smart choices.
"Good" carbs include whole grains (unbleached rice, barley, quinoa); organic root vegetables (potatoes, carrots, beets, rutabagas, turnips); oats (especially steel cut); and starchy legumes (black and kidney beans).
Heavily marketed white carbs that are mixed with sugar and packaged in boxes are designed to make you crave more. They're no good for your body, your mind, or your soul. They really do a number on your blood sugar, turning what should be a steady blood glucose level of 70-100 ng/mL into a wild roller-coaster ride. Do yourself and your family a huge favor and just swear off white sugar, white flour, and refined carbs. Within a few weeks, you'll notice that they taste hideously sweet and fake. And you'll also notice how much better you feel when you're not riding the blood sugar roller coaster.
Dr. Kane's Weight-Loss Advice
If you want to lose weight, you need to be in a state of ketosis while shedding pounds. This is when the body burns stored fat. KetoStix, which test your urine, are a great way to see how you're doing. If your morning urine turns the indicator strip a pink-burgundy color, you're tapping into your fat stores and heading in the right direction.
To reach and maintain a healthy weight, you ultimately need to figure out how many-and what kind of-carbs you can eat without packing back on the pounds. I never encourage patients to drink alcohol, but if you enjoy moderate social drinking and it doesn't put a barrel on your belly, alcohol may reasonably be your carb of choice. For those who aren't wheat intolerant, fresh, high-quality bread may fit the bill. No matter what you choose, the key is moderation and maintenance. If you find the scale creeping up again, cut it out.
Just remember: there is no such thing as an "essential carbohydrate," as opposed to "essential amino acids" (protein) and "essential fatty acids." We can live perfectly healthy lives without eating simple carbs (sugar, flours, alcohol). We cannot live without eating protein or fat (unless you have extra fat to burn, then it's fine to go on a ketogenic low- to no-fat diet until you reach a healthy weight).
Unless you're fabulously wealthy and can hire a full-time organic chef, you will need to put time into your food plan, every week. Just face that fact and schedule it like you schedule exercise, work, and fun-it will become part of your routine in no time.
Cooking Lessons
Need help putting together healthy, veggie-rich meals that are easy-to-make and delicious? Try these great websites:
You will need to put time into your food plan, every week. Just face that fact and schedule it like you schedule exercise, work, and fun.
Emily A. Kane, ND, LAc, has a private naturopathic practice in Juneau, Alaska, where she lives with her husband and daughter. She is the author of two books on health, including Managing Menopause Naturally. Visit her online at dremilykane.com.
1 of 9
The term "lower abs" is actually a misnomer—your rectus abdominis muscle, or abdominal wall, actually covers your entire midsection and connects at your pelvis. Still, women (and men!) are constantly searching for exercises that will help eliminate that dreaded lower-belly pooch. (We got your attention, right?) And now the search is over! Most of these effective exercises target multiple abdominal muscles, so you'll maximize your belly burn with every rep.
A major perk of these effective lower-abs exercises: Focusing on the activation of your core is one of the keys to success with these abs toners (and any abdominal exercise). In fact, one study from Hull University found that people who mentally focused on their muscles and how they were moving experienced greater muscle activity, which can result in greater strength gains over time. So don't just "go through the motions." We've included "mind your muscle" tips with every exercise to help you maximize your results.
How it works: Do the prescribed number of sets and reps for each lower abs exercise consecutively, taking a short 45- to 60-second rest between sets. Perform the full lower-abs workout on 3 or 4 nonconsecutive days each week. Another option is to pick a few of your favorite moves and do them after a cardio session or add them into your regular strength-training routine.
You'll need: A mat or towel. That's it!

2 of 9
This lower-abs exercise is a great way to wake up your core at the beginning of your workout or as a stand-alone exercise any time you want to squeeze in some extra abs work.
How to do it: Lie faceup with knees and hips bent 90 degrees, feet flexed. Extend arms and press both palms on top of thighs. Take a deep breath in, and as you exhale, brace abs in tight, pressing lower back against the floor as you push thighs into hands, pushing back against them (note: your legs should not move). Hold for 1 count and then release. Do up to 3 sets of 10 repetitions in a row.
Make it harder: As you exhale, lift your head and shoulders off the floor as you press thighs and palms together. Lower upper body back down to the floor as you inhale.
Mind your muscle tip: During the contraction, imagine you are "zipping" your muscles from your pelvic floor up to your belly button (drawing them in tight as if trying to squeeze into a pair of low-rise skinny jeans).

3 of 9
This Pilates-inspired move uses the same pressing action as the static press to deepen the engagement of your abdominals. The weight of your extended leg makes it more challenging.
How to do it: Lie on back and bend both knees into your chest, feet flexed. Interlace fingers on top of right thigh and extend left leg out parallel to the floor. Lift head and shoulders off the floor, curling up over the top of ribcage and looking at legs. Press palms against right thigh while tipping pelvis to bring right knee in toward chest (your hands should add resistance to your leg). Switch legs and press palms against the left thigh as right leg extends parallel to the floor. That's 1 rep. Do up to 3 sets of 10 repetitions in a row.
Make it harder: Keep both legs straight, pressing against the top of thigh as one leg pulls in, and then perform a scissoring action to switch sides.
Mind your muscle tip: As you push against your thigh, imagine you are pulling your leg into your chest with your abs. Focus on feeling the extra resistance in the abs, not your thighs or hip flexors.

4 of 9
This may be a small movement, but it works your lower abdominals in a big way!
How to do it: Sit with knees bent, feet flat on the ground. Lean back to prop upper body up on elbows (your back should remain lifted), palms facing down. Brace abs in tight and lift legs into a 90-degree angle (knees should be touching), toes pointed. Slowly bring legs over to the left (both hips should remain on the ground). Keeping the 90-degree angle with legs, lower legs and then lift them up to the right, as if you were tracing a letter "U" with your knees. That's 1 rep. Do 20 reps total, alternating sides each time.
Make it harder: The longer the lever, the harder this gets, so if you want more of a challenge, try extending your legs out farther (even straightening them completely).
Mind your muscle tip: Use your breathing to help deepen the abs work: Inhale as you sweep your legs over to one side and down, and then as you come up to the other side, exhale and visualize your belly button pressing all the way back to your spine.

5 of 9
This is another move that's much harder than it looks. You'll engage your abs and just about every other muscle in your body!
How to do it: Sit with your legs extended, feet flexed, hands just outside your hips with your fingertips facing your forward. Brace your abs in tight and press down through your arms to lift your hips a few inches off of the floor. Bend your knees slightly, keeping your heels on the ground. Inhale and scoop your abs in deeper towards your back, and as you exhale, fully extend your legs and try to push your hips slightly behind your shoulders. Hold for 1 count. Bend your knees and return hips under your shoulders to gently lower to the floor. That's one rep. Repeat up to 3 sets of 10 reps.
Make it harder: Instead of lowering your hips back down to the ground in between reps, try to keep them lifted off the floor the entire set.
Mind your muscle tip: Focus on lifting and moving your hips with your abs, only using your arms and legs for assistance.

6 of 9
This two-for-one Pilates move doubles your flat-belly results.
How to do it: Lie on back with arms at sides. Extend both legs straight up to the ceiling, crossing right leg over left, toes pointed. Brace abs in tight, inhale, and lower legs about 45 degrees. As you exhale, bring legs back into body and lift legs overhead on an angle (as if aiming to where the wall meets the ceiling behind you), lifting hips and back off the floor, pressing down with arms for support. Pause for 1 count, and then slowly roll through spine to lower hips and bring legs back to the starting position. That's 1 rep. Do up to 3 sets of 10 repetitions.
Make it easier: This move is tough, so if you can't lift your hips all the way off the floor, take your time to get stronger before attempting. Start by practicing drawing your legs up and over, and see if you can lift just a few inches off the mat and then immediately lower.
Mind your muscle tip: Your abs should remain constantly pulled in toward your back during the entire exercise. Use the visual of "zipping" your muscles in from your pelvis up to your belly button as you lift your legs overhead.

7 of 9
You'll feel every inch of this plank in your abs (along with your arms and shoulders too).
How to do it: Begin in an elbow plank position, hands clasped, with feet slightly wider than hip-width apart. Step left foot toward hands as you begin to lift hips up slightly, quickly taking another step in with right foot, lifting hips a little more. Step the left foot in again, lifting hips higher and then again with the right, so hips end lifted high in a pike position. Slowly inch back out, reversing the way you walked in, until you return to the starting plank pose. That's 1 rep. Do up to 3 sets of 5 reps.
Make it harder: Take larger steps in to raise your hips even higher in the pike position, and increase the number of reps per set from 5 to 10.
Mind your muscle tip: Your abs should be drawn in during this entire exercise. As you step your foot in, think of bracing your abs in deeper with each step.

8 of 9
Engage those hard-to-target obliques with this dynamic twist on the traditional plank.
How to do it: Begin in a full plank position with feet together. Bend right knee across to the left as you slide right foot up to the inside of left knee into a passé position (your hips should turn to the left and you'll pivot slightly on the ball of your left foot). Slide right leg back to starting position and then repeat to the left. That's 1 rep. Do up to 3 sets of 10 reps.
Mind your muscle tip: Imagine your abs are drawing your knee up and across your body. Pull your abs in tighter as you lift your leg.

9 of 9
How to do it: Lie faceup with knees bent and turned out, feet flexed, and heels pressed together. Inhale and lift head and shoulders off the floor, curling up over ribcage, looking at legs. Reach arms outside of hips off of the floor, palms facing down
As you exhale, press out through heels and extend legs 45 degrees, squeezing the backs of knees together. Inhale and bend heels back into body. That's 1 rep. Do up to 3 sets of 10 reps.
Make it harder: Extend your legs lower to the ground as you press out, or keep both legs extended and turned out, and then lift and lower them instead of bending and extending—just be sure your back stays down during the movement!
Mind your muscle tip: Focus your attention on your abs, forcing them to do most of the work to lift and lower your legs. Be sure to keep your lower back pressed into the floor the entire time.
Photos: Vanessa Rogers Photography