Buffalo Chicken Salad with Greek Yogurt (modified for the 17 Day Diet)
As I was browsing Pinterest for inspiring culinary creations, I stumbled upon this delicious-looking Buffalo Chicken Salad recipe that a health blogger had adapted from an original recipe to make it healthier. Well, I’ve modified the adapted version just a tab bit to make it 17 Day Diet approved.
Here it is…
Buffalo Chicken Salad with Greek Yogurt
5 oz non-fat plain Greek yogurt
1/3 cup Franks Red Hot Wings Buffalo sauce
1/2 tsp garlic powder
1/4 tsp fresh ground black pepper
1 lb boneless, skinless chicken breast, shredded
2 celery stalks, finely chopped
1/2 cup cilantro, minced
1/2 cup (2 oz) low-fat mozzarella cheese
Directions:
In a large bowl, whisk together yogurt, buffalo sauce, garlic powder, and black pepper. Stir in chicken, celery, cilantro, and low-fat mozzarella cheese. Refrigerate until serving or up to 5 days in the fridge.
Yield: 4 cups chicken salad
Cycles 1 and 2- Top chicken salad over a bed of lettuce
Cycle 3- Top chicken salad over 1/2 whole grain bagel, a whole wheat tortilla pocket or whole wheat tortilla
Photo courtesy of Judy H. Judy is a member of my private FB group and she’s always using Sunburst tomatoes for garnish in her photos! Thanks, Judy! Looks delish!
Original article and pictures take 17ddblog.com site
Remember not to handle the chicken too much, or it may turn out dry and tough. Get it all mixed together as quickly and gently as possible.
Some members reported that their meatballs were a bit spicy, so if you’re not a super fan of spicy food, either cut back on the hot sauce, use half hot sauce and half of your favorite low-sugar barbecue sauce, or simply make a bit more of the Greek Yogurt Blue Cheese Dressing! Enjoy!
Slow Cooker Buffalo Chicken Meatballs
Ingredients:
1 pound lean ground chicken
½ onion, minced or grated
1 teaspoon garlic powder
1 teaspoon onion powder
Salt and Pepper
Olive Oil
1 cup Frank’s Red Hot Sauce
Directions:
Mix all ingredients together except hot sauce. Roll chicken into 1 oz balls for a total of 16 or so.
Heat olive oil in a large pan on medium heat. Add chicken balls to pan and brown slightly on all sides.
Transfer chicken to slow cooker and add hot sauce. Cook on low for 2 hours or until chicken is cooked through.
Please note: If you don’t have a slow cooker, brown the meatballs as per the directions, and then add the meatballs and hot sauce to a dish and bake in an oven heated at 350 degrees F and bake anywhere from 15 to 30 minutes, depending on how much you browned them in the pan.
Yields 4 Servings
Roasted Cabbage Wedges
Ingredients:
1 tbsp plus 2 more tbsp extra-virgin olive oil
1 medium head green cabbage, cut into 1-inch-thick rounds
Coarse salt and ground pepper
Directions:
Preheat oven to 400 degrees F.
Brush a rimmed baking sheet with 1 tbsp extra-virgin olive oil. Place 1 medium head green cabbage, cut into 1-inch-thick rounds, in a single layer on sheet and brush with 2 tbsp oil.
Season cabbage with coarse salt and ground pepper.
Roast until cabbage is tender and edges are golden, 40 to 45 minutes.
Drizzle a bit of blue cheese dressing (optional)
Yields 4-5 Servings
Greek Yogurt Blue Cheese Dressing
Ingredients:
½ c plain Greek Yogurt
1 Tablespoon apple cider vinegar
1 Tablespoon olive oil
Salt and Pepper, to taste
¼ teaspoon dry mustard
1/4 cup crumbled low-fat blue cheese
Directions:
Combine all ingredients together except blue cheese and mix well. Gently fold in blue cheese.
All recipes are approved for all cycles
Photo Courtesy of Michelle S., a member of my 17DD Blog Facebook Community
Original article and pictures take 17ddblog.com site
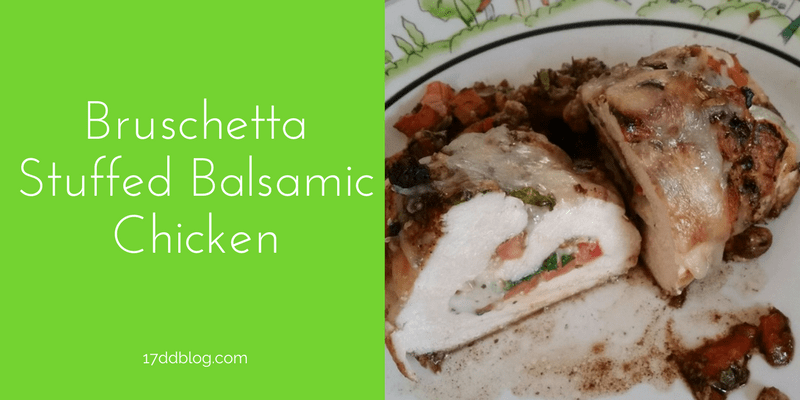
During my latest 5-Day Dinner Party for the re-opening of my weekly meal planning service for the 17 Day Diet called Simply17, one of our entrees was this delicious Balsamic Chicken stuffed with a yummy tomato and cheesy mixture. The sweetness of balsamic made this dish a hit!
You can prepare the recipe as-is by stuffing your chicken breasts, or top your chicken breasts with the tomato and cheese mixture instead. Either way, this dish is tasty!
Bruschetta Stuffed Balsamic Chicken
Ingredients:
2 tomatoes, diced
1/3 cup packed fresh basil ribbons
1 cup shredded low-fat mozzarella cheese, divided
4 skinless, boneless chicken breasts
salt and pepper, to taste
2 tablespoons olive oil
1/4 cup balsamic vinegar
1/3 cup low sodium, chicken broth
3 garlic cloves, minced
1 teaspoon Italian Seasoning
Directions:
Preheat oven to 350F.
In a large bowl add tomatoes and 1/2 cup of the mozzarella cheese and basil. Stir to combine. Set aside.
Depending on size of chicken breasts, place up to two breasts at a time in one large zip lock bag (or one breast in between two layers of plastic wrap) and pound until you achieve a 1/4-inch thickness. Be careful not to tear or rip through the chicken as you’ll be stuffing them!
Season chicken on all sides with salt and pepper, to taste.
Take your tomato mixture and spoon a generous portion over the top of each chicken breast. Reserve leftover tomato mixture for sprinkling over the top.
Gently roll up the chicken breasts, wrapping them tightly, and secure both ends with toothpicks to prevent chicken from unrolling while cooking.
In a large frying pan or oven-proof pan, heat olive oil on medium high heat.
Add rolled chicken breasts to pan and cook for about 6 to 7 minutes, or until all sides are lightly browned.
While chicken is browning, combine the balsamic vinegar, broth, garlic and seasoning to a bowl. Whisk until mixture is fully combined. Set aside.
Remove chicken from stove. Spoon remaining tomato mixture over chicken and gently pour balsamic vinegar mixture over chicken.
In your oven-proof pan or baking dish, place chicken in oven and bake for 20 minutes.
Flip chicken once and return to oven to continue baking for another 15 minutes.
Remove chicken from oven and top with remaining 1/2 cup of mozzarella cheese and return to oven to continue baking for an additional 5 minutes until cheese is melted and bubbly.
Remove from heat and let stand for a few minutes before serving. From pan, scoop remaining tomato and balsamic mixture and serve over chicken.
Note: If you want to make this dish a bit easier and save some time, rather than stuff the chicken, cook chicken breasts with mixture on top. It’s perfect either way!
Yields 4 Servings
Approved for all cycles
Here are a few photos from party guests:
Photo above courtesy of Sandra J. – I love how Sandra’s chicken was stuffed perfectly! What a beauty!
Photo above courtesy of Molly C. – I loved Molly’s creation, along with her use of our Simply17 cards where she displayed the name of the dish. So creative!!
Original article and pictures take 17ddblog.com site
Broiled Tilapia with Parmesan (modified for the 17 Day Diet)
I saw the most gorgeous tilapia recipe while browsing Pinterest. I thought I’d modify the recipe ever so slightly so it’s 17 Day Diet friendly with less fat (used Greek Yogurt instead of butter and mayo)! Enjoy!
Broiled Tilapia with Parmesan (modified)
Ingredients:
4 Tilapia Fillets (defrosted if frozen)
1/4 Cup Parmesan Cheese
1/8 Cup Plain Non-Fat or Low-Fat Greek Yogurt
1 1/2 Tablespoons Plain Non-Fat or Low-Fat Greek Yogurt
1 Tablespoon Fresh Lemon Juice
1/2 Teaspoon Fresh Dill
Pepper to taste
Directions:
Turn broiler onto high and adjust oven rack to the top.
In a small bowl, combine all ingredients except the tilapia. Set aside.
Place tilapia fillets on a foil lined pan.
Broil for 3 minutes.
Remove from the oven, flip over and divide the parmesan mixture over the uncooked sides of the tilapia.
Return to the oven and broil an additional 3-4 minutes making sure not to over cook the fish.
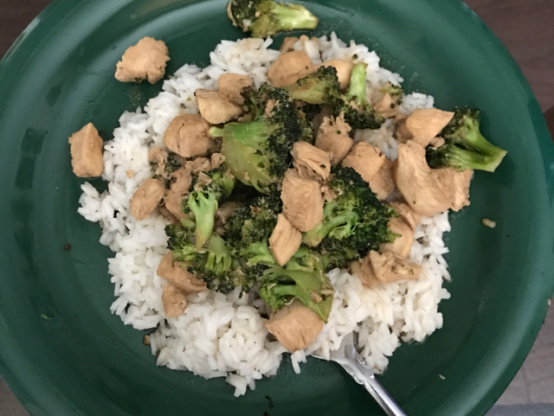
Prepared this for my family tonight, since we're trying to keep our carb count fairly low. I'd seen it a few days earlier and been intrigued. After fixing it, I have to say that it wasn't half bad by any stretch of the imagination. I would have liked for the flavor to have gotten deeper into the broccoli, but it made the chicken absolutely awesome! The directions were pretty straight forward, and the dish wasn't hard to fix. I scaled it up and have a lunch for tomorrow loaded with protein, low in carbs and fat, and fairly tasty. We will be chomping down on this one again.
I made this last night. I was hesitant to make this dish because of the mustard, but will admit that the mustard made the recipe. I agree with other reviewers who said that the directions to make this meal are a bit time-consuming, so I did tweak that. Here's how I made this: I cut 1 lb. of chicken breast into bite-sized pieces and seasoned with salt, black pepper, paprika and garlic powder. I then fried the chicken pieces in olive oil in a large skillet. While the chicken cooked, I heated two 10 oz. containers of frozen chopped broccoli in the microwave, then added the broccoli to the chicken. I then added 1/2 a cup of vegetable stock. I didn't have soy sauce so I added A-1 sauce for the tang. (It worked.) I didn't have Dijon so I added spicy brown mustard. I then covered the skillet and heated for 10 minutes on low heat, stirring occasionally. I disagree with other reviewers who said the dish was too watery and needed cornstarch to thicken. I served this meal over white rice. My husband loved this meal but thought it needed some heat, so he sprinkled hot red pepper flakes on his portion. This recipe is a keeper!
Original article and pictures take geniuskitchen.sndimg.com site
New to the 17 Day Diet is the optional Transitional Day Fast where you are allowed to drink smoothies for each of your meals for an entire day. You can catch up on how the Transitional Day Fast works.
Here is the recipe for the breakfast smoothie for the 17 Day Diet.
Breakfast Smoothie Recipe
1 cup unsweetened almond milk
1/2 cup plain low-fat yogurt
1 scoop vanilla whey protein powder
1 serving powdered fiber
1/2 cup crush pineapple, canned in its own juice, drained
1/2 frozen banana
Place the ingredients in a blender, and blend until smooth.
Tip from Book: Blend the ingredients for several minutes as this will add air to the smoothie and the extra air will make you feel fuller.
17DD Blog Tip: Add crushed ice to your ingredient list and blend. The ice will make the smoothie slushy and add a bit more volume to your meal.
Original article and pictures take 17ddblog.com site
Break Your Weight Loss Goal Into Smaller Mini Goals for Success
Weight loss and goal setting go hand in hand. Your weight loss goals can either make or break your progress, so it’s best to form a game plan that sets you up for success right from the start.
Which goal sounds more manageable and one you might achieve with greater success? Lose 100 pounds in one year or lose 10 pounds in one month?
If you’re like me, I’m guessing you’d choose the smaller, more realistic goal of 10 pounds.
While it’s quite important to understand what your overall objective is (i.e. lose 100 pounds), it’s equally important to break up your main goal into manageable smaller goals or milestones.
Let’s say you have a beach trip coming up in a month. Rather than set a goal to lose a 20 pounds in one month, you give yourself a few mini goals or milestone to achieve.
Milestone or Mini Goal #1 for Beach Trip
In two weeks, I will zip up and comfortably fit into my pair of dress slacks that I’m currently not able to wear.
After about nine days of working towards this first mini goal, you’re able to achieve this because you set a realistic goal you knew you’d be able to achieve in a short amount of time.
Milestone or Mini Goal #2 for Beach Trip
In two weeks, I will be able to button up my favorite shirt and it will fit comfortably.
In about a week and a half you’re able to wear your shirt and see a difference in how your clothes fit because you set a reasonable mini goal.
Get the idea?
So if you’re like me and have a difficult time sticking to a “big picture goal” like losing XXX pounds in a year, don’t fret!
The Lesson Here…
An effective strategy I use to keep my long-term objective in sight is to break my overall main goal into “mini goals” or “milestones” so that I don’t lose steam and give up.
What happens when you achieve a goal and see results? You guessed it! You gain momentum, you stay motivated and you continue to push yourself to achieve even better results!
Original article and pictures take 17ddblog.com site
Blend spinach and yogurt first. Add blueberries and blend again. Depending on thickness of smoothie, you made add a bit of water to thin it out, if desired or use Kefir instead of yogurt. Depending on the ripeness of your fruit, you may add Stevia to sweeten the smoothie.
Note: You may use Kefir instead of plain yogurt if you prefer
Consider adding whey protein if you use as a meal replacement.
Yields 1 Serving
Approved for all cycles
Photo Courtesy of Kelly J.
Kelly used kefir in her green smoothie pictured above. Thanks for sharing, Kelly!
Original article and pictures take 17ddblog.com site
Before we dig into brussels sprouts, I need to give a gigantic shout out to Erin and Melissa for the redesign of Mountain Mama Cooks. I’ve been wanting to update my look and implement some new features for awhile now but held off until the timing was right. I knew right after meeting these two, that they were the gals to do the job. Together, they run Wooden Spoons Kitchen, a boutique web design and hosting company and if I do say so myself, they knocked it out of the park! Thank you doesn’t seem like enough. The entire process was inspiring, fluid and you gals gave me exactly what I wanted. Thank you for your patience, hard work and being all around super savvy, design maven, rock stars!
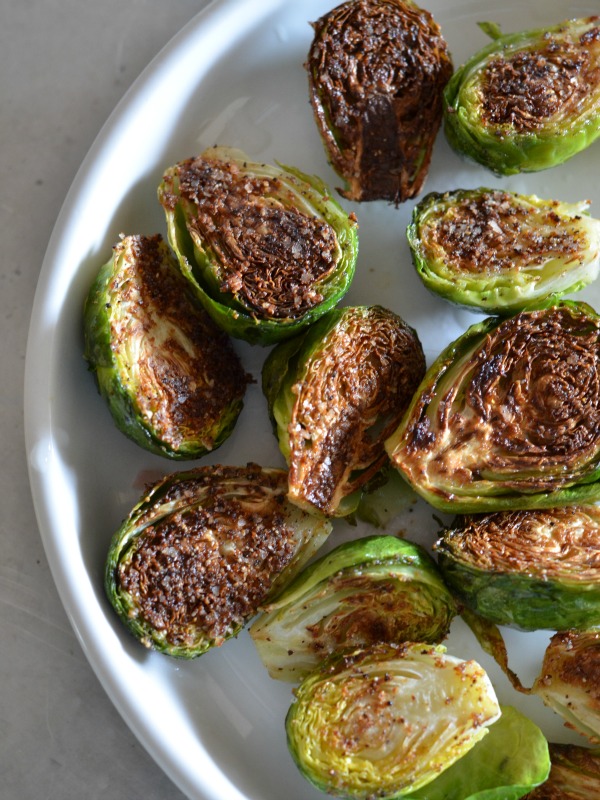
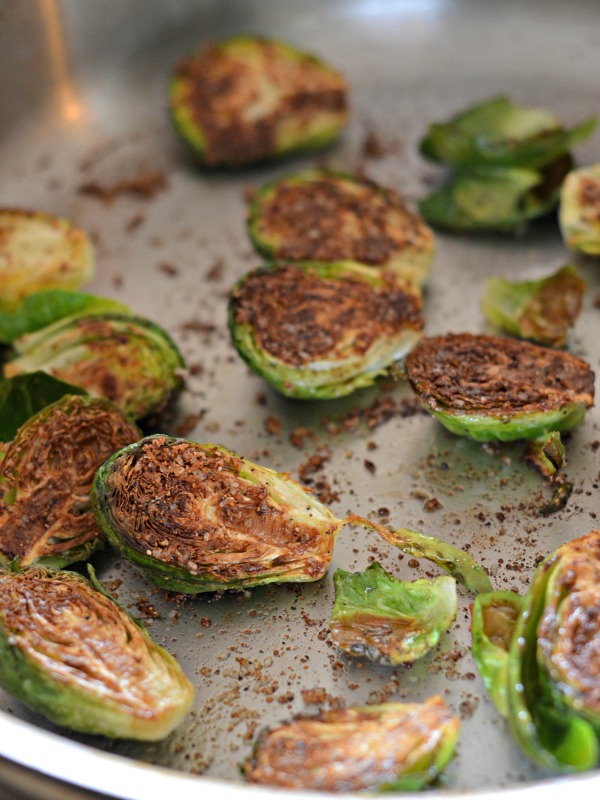
You know a recipe is good when you make it six times in two weeks. Never in my life did I think I’d be making brussels sprouts multiple times a week. And never in my life did I think I could possibly love brussels sprouts more than these roasted ones with crispy bacon and balsamic. But here I am to tell you that a) I’ve easily eaten 2+ lbs of brussels sprouts in the past 10 days and b) these ones are better than my beloved roasted version with bacon. The best part? They only take 8 minutes.
I hosted a small brunch on Easter and since I was only a few days into my 21 day sugar detox, the menu was a ham cooked in the slow cooker, a veggie frittata, a spinach and avocado salad and these awesome pan seared brussels sprouts that my friend, Melissa made. It was all I could do to not eat all of them. Said no one ever about brussels sprouts…
Crispy and garlic loaded on one side, steamed to perfection, these are nuggets of veggie gold. Can you tell I haven’t had sugar in almost a month? I’m gushing about brussels sprouts. Man, someone get me a cookie stat. Or some ice cream. How about a piece of dark chocolate? You know at this point, I’d settle for an orange.
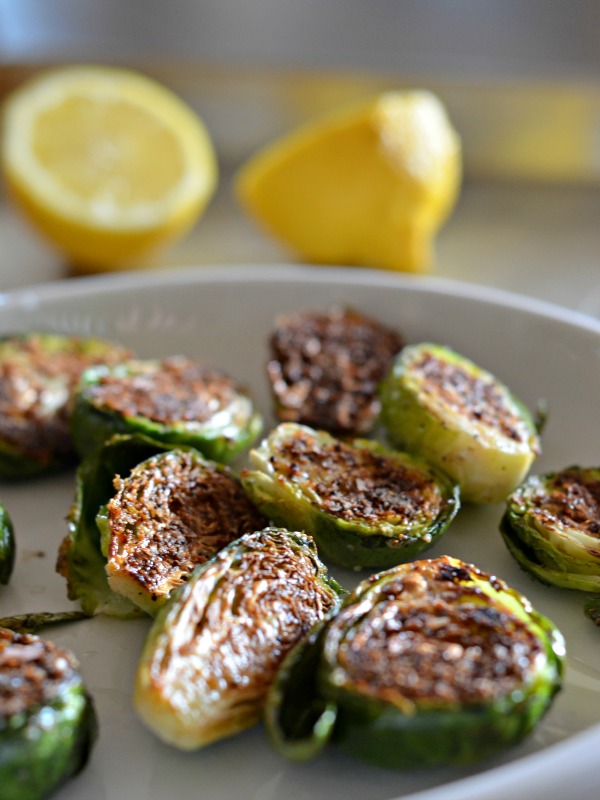
All joking aside, these brussels sprouts are out of this world. The key is using a stainless steal pan and heating it up so it’s piping hot when you lay the brussels in. The recipe below is more of a guide line. The recipe is forgiving and it’s easily adaptable to suit your taste. Play around until you get it right. The squeeze of lemon at the end makes takes ’em over the top. Don’t leave it out. Hope you all had a fabulous weekend!
More of a guideline than a recipe, these brussels sprouts are just as easy to make for one as they are for a group. Play around until you get 'em just how you like them!
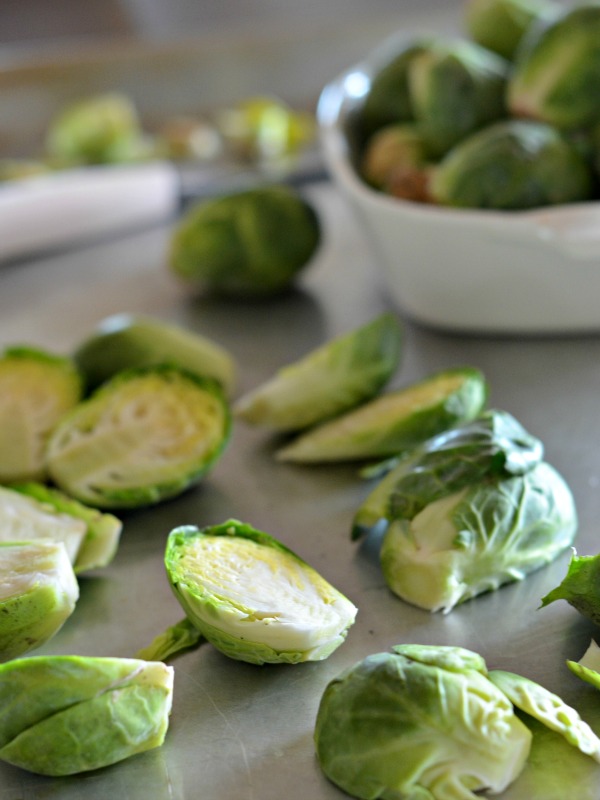
In a stainless pan, heat a tablespoon or so of olive oil over medium-high heat.
When pan is nice and hot (1-2 minutes), place brussels sprouts cut side down. If the brussels sizzle, that's a good sign!
Place tight fitting lid on pan and turn heat to medium low.
Set time for 8 minutes and don't lift pan lid or disturb the pan.
When timer goes off, remove pan from heat and sprinkle brussels with a drizzle of fresh lemon juice.
Original article and pictures take www.mountainmamacooks.com site
My sister handed me a stack of old Martha Stewart magazines and I discovered this little gem. The bell pepper adds gorgeous color and a very healthy veggie to your morning. Did I mention it’s really easy?
You’ll definitely impress your family and breakfast guests with this bell pepper egg-in-a-hole. Thank you Martha! Serve the eggs-in-a-hole with buttered toast. English muffins are nice too. You can cook the eggs to the doneness you prefer.
Ingredients for Bell Pepper Egg-in-a-hole:
1 red bell pepper (yellow would probably work just as well)
4-5 large eggs
Salt
Pepper
1/4 cup grated parmesan cheese (other cheese would probably work too)
1 Tbsp Olive oil
How to Make Bell Pepper egg-in-a-hole for Breakfast:
1. In a large, non-stick skillet, heat 1 Tbsp olive oil over medium/high heat. Cut peppers into 1/2″ rings and remove the seeds and centers. Place sliced peppers into the pan and let them saute for a minute.
Bell Pepper Egg in a Hole-2 Bell Pepper Egg in a Hole-4
2. Crack one egg into the center of each bell pepper slice. Start pouring the egg in slowly; it prevents the egg from leaking and forms a nice seal, but some will leak no matter what; don’t fuss over it; it will still taste great!
Bell Pepper Egg in a Hole-5 Bell Pepper Egg in a Hole-6
3. Sprinkle salt and pepper over each egg. Saute for 3 minutes, then flip it over carefully.
Bell Pepper Egg in a Hole-8 Bell Pepper Egg in a Hole-9
4. Top with a generous amount of parmesan. If you want your yolks to be juicy (over easy), cook another minute.
Bell Pepper Egg in a Hole-10 Bell Pepper Egg in a Hole-11
P.S. As a (almost licensed) nurse, I feel compelled to say that eggs should be fully cooked for high risk populations including elderly, pregnant and young children.
Be Kind to Your Liver, Your Ass Will Thank You Later Detox your liver (take out the trash) and jumpstart your weight loss! #17DayDiet
Ever wonder why you start the 17 Day Diet off with detox by elimination of sugars, unhealthy fats and carbohydrates? Is it to help you lose weight quickly? Sure. Or is it maybe for another reason?
Well, when your liver is overloaded with toxins, it is nearly impossible for your liver to rid your body of the dangerous toxins and to help your body digest foods and fats.
If you start a weight loss regimen without first detoxing or cleansing your body (and liver), you may have a difficult time losing actual fat. You may lose water weight at first, but most people who have a buildup of toxins in their body stop right there.
Think of your body as you do a trash can. You put garbage into your trash can and there it sits under the sink for days at a time. You take your trash and place it into the main trash bin where it sits outside your house, for maybe a week. It’s finally trash day and you have piles of trash waiting on the curb to be picked up and hauled away.
Think of your liver as the garbage man who picks up your pile of trash from the curb and takes it to the dump.
If your liver is filled with toxins, it will not be able to properly rid your body of the “garbage” — this is unhealthy and makes for losing weight very difficult.
If your liver is not working properly because it’s overloaded with toxins, you may experience any of the following and more:
Extreme fatigue
Bloated Stomach
Blood sugar problems
Hormone imbalance
Cleansing your liver thoroughly prior to starting your weight loss program will allow your liver to be more effective in its job, allowing for proper digestion and weight loss.
Some of the natural cleansing foods to help rid your body of such toxins include the following:
Garlic
Grapefruit
Beets and carrots
Green Tea
Leafy green veggies
Do these foods sound familiar? They should if you’re on the 17 Day Diet.
If you are experiencing some of these symptoms or if you are not losing weight even if you’re following the 17 Day Diet to the “T”, consider a complete Detox/Cleansing program to help rid your liver and body of these deadly toxins and to allow you to be healthy once again.
Original article and pictures take 17ddblog.com site
It’s easy to get bored with your regular veggie routine. You know what I’m referring to – steamed carrots, steamed broccoli, steam this and that. Enough already! I found a wonderful recipe that highlights the natural flavors of the vegetables, but adds in the the luxurious flavor of Balsamic vinegar. Yes, I described it as luxurious! If you think of your flavors this way, you feel like a million bucks!
Balsamic Roasted Brussels Sprouts and Carrots
Ingredients:
2 tablespoons balsamic vinegar
1 tablespoon olive oil
1 tablespoon maple syrup note: either use Stevia or omit all together
2 cloves garlic, minced
1/2 teaspoon dried thyme
1 1/2 pounds brussels sprouts, halved
6 carrots, cut diagonally in 1 1/2-inch-thick slices
Kosher salt and freshly ground black pepper, to taste
1/4 cup dried cranberries
2 tablespoons chopped fresh parsley leaves
Directions:
Preheat oven to 400 degrees F.
Lightly oil a baking sheet or coat with nonstick spray.
In a small bowl, whisk together balsamic vinegar, olive oil, maple syrup, garlic and thyme; set aside.
Place brussels sprouts and carrots in a single layer onto the prepared baking sheet. Stir in balsamic vinegar mixture; season with salt and pepper, to taste.
Place into oven and bake until browned and tender, about 20-25 minutes.
Serve immediately with cranberries, garnished with parsley, if desired.