The beauty of egg cups is that they are super versatile – you can literally add any veggie combination you want and still end up with a terrific egg cup!
Here’s a 17 Day Diet compliant recipe for egg cups shared by a fellow 17dd Blog reader, Janice. Literally use the ingredients you have on hand, but if you need a starting recipe, this is the one to use!
Veggie Egg Cups
Ingredients
1 16oz carton of egg whites plus 2 whole eggs (lightly beaten) (may use Egg Beaters)
1 chopped green onion
1 large handful cherry tomatoes, sliced (or more)
1/3 cup of frozen spinach, thawed
1 red or green bell pepper, chopped
1/4 cup shredded Parmesan cheese
Salt & pepper to taste
Directions
Preheat oven to 350 degrees F.
In a large bowl, mix all ingredients together. Pour mixture into greased muffin tins or silicone baking cups.
Bake for approximately 30-35 minutes or until toothpick comes out clean.
Note from Janice: can use cooked broccoli, sliced mushrooms, red onion, red pepper flakes…whatever you have on hand & sounds good!
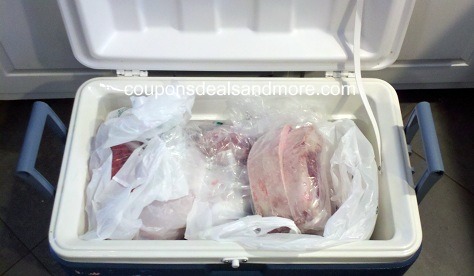
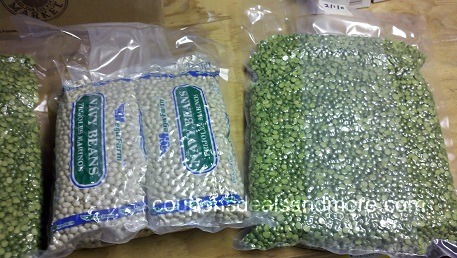
Hubby is the undisputed king of foodsavering. Nothing comes in this house and goes into one of the freezers without his foodsavering it – well, maybe not frozen vegetables or ice cream, but pretty much everything else! Here are some of his vacuum sealing tips and tricks:
We recently made a trip to the local slaughterhouse and brought back quite a bit of meat.
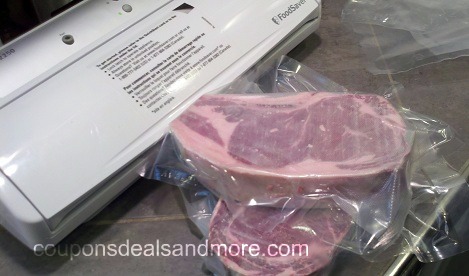
And then he choose what meat he wanted to work with.
Since these were simple steaks, it was pretty straightforward. He just place one of each into a bag, and foodsavered:
He uses one steak underneath the other to raise the steak he is currently working on to the correct height. It makes it easier to use your hands to press the button and hold the flap to the foodsaver.
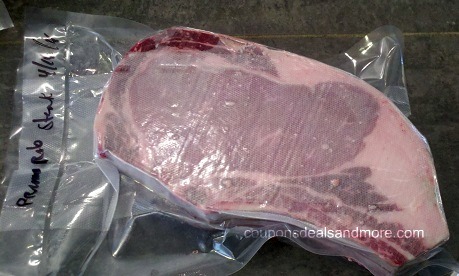
The steak is labeled with date and type and now ready for the freezer.
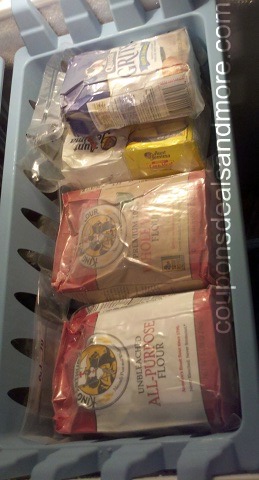
The flour, lard and butter we keep in the freezer, the beans and peas in the stockpile. Since I hate the thought of bugs, I definitely am onboard with this habit of hubby’s!
Are you a vacuum sealer devotee like my hubby? What unique ideas do you have for vacuum sealing?
Note: this post originally appeared on my old blog, Coupons, Deals and More.
• Disclosure the links in this post may be affiliate links.
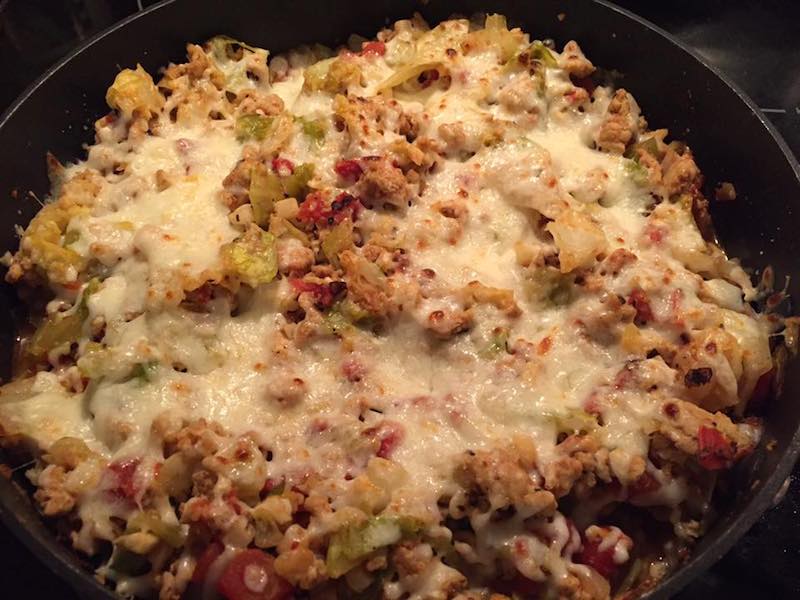
This is a recipe I featured in my latest C1 Challenge, and it was a great hit! This recipe is a healthier version of the traditional cabbage roll. It’s acceptable for all cycles of the 17 Day Diet and is super easy to make (much easier than the traditional recipe).
Unstuffed Cabbage Casserole
Ingredients
1 pound Ground Lean Turkey (or chicken)
2 Tablespoons Olive Oil
1 Small Onion, chopped
1 teaspoon Garlic Powder
1/2 teaspoon Onion Powder
1/2 teaspoon Dried Thyme
1/4 teaspoon Ground Pepper
1/2 teaspoon Salt
15 ounce Can Diced Tomatoes
1 Small Head Small Green Cabbage – chopped
½ Cup Water
1 Cup Low-fat Mozzarella Cheese
Salt/Pepper To Taste
1 Cup Riced Cauliflower, cooked
Directions
In large pot or pan, over medium high heat, brown turkey with olive oil and onions.
Reduce heat to medium; add garlic powder, onion powder, thyme, salt and pepper and stir until well combined.
Add diced tomatoes and water to mixture and bring to a boil.
Add cabbage, cover and reduce heat to medium low. Cook 7 to 10 minutes.
While mixture is cooking, prepare the cooked riced cauliflower. In a food processor or with a grater, rice your cauliflower into rice-sized pieces. Use enough cauliflower to yield 1 cup riced.
In an un-oiled pan over medium heat, cook the cauliflower until all moisture is gone, about 6-8 minutes. Set aside.
When your meat mixture is finished cooking, cooked riced cauliflower to pot and let flavors marry for a minute or two.
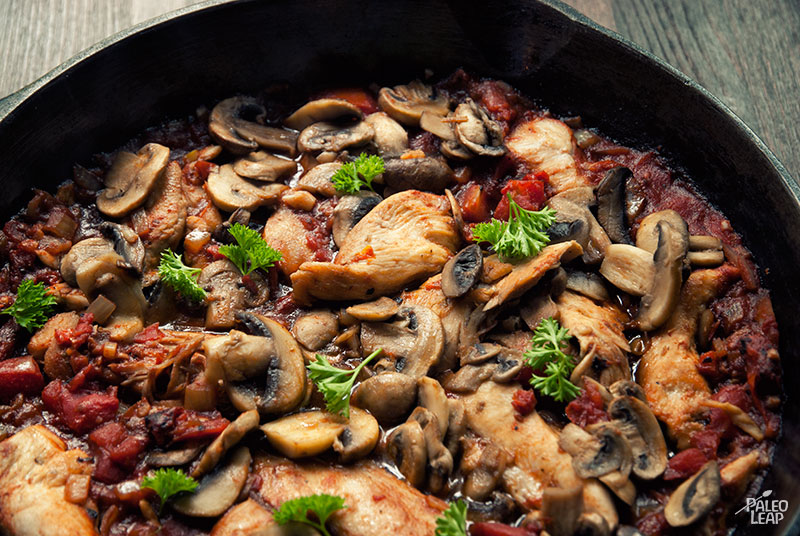
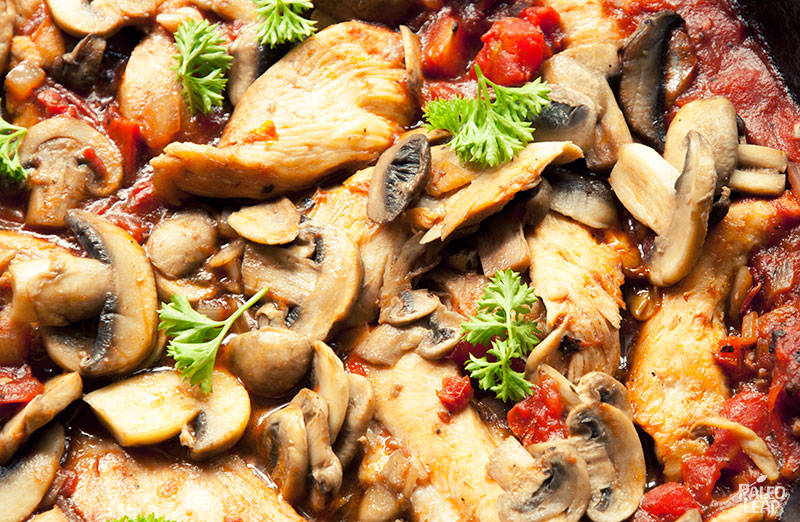
Calling all tomato-lovers! This easy weeknight dinner has it all: sun-dried and fire-roasted tomatoes to double up on that full-bodied savory flavor. Add the umami from the mushrooms and the time-honored combination of garlic and herbs, and you’ve got a surefire winning recipe, all in just a few minutes of cooking time.
The tomato-based sauce is also perfect for the meat in this recipe: chicken tenderloins are extremely lean, so cooking them in the rich sauce helps add flavor and prevent them from drying out. If you’ve never cooked with tenderloins before, they’re very easy to use. They’re essentially like little miniature breasts: extremely versatile and easy to use in pretty much whatever you want to cook (if you’ve ever eaten chicken tenders at a restaurant, you were eating the tenderloin). In fact, there’s only one real difference between a breast and a tenderloin: the tenderloin is cheaper!
With just a few minutes of prep and cook time, this recipe would be the perfect solution to a busy evening when you don’t have a lot of time to cook or wash up a huge pile of dishes. And it makes great leftovers, too, even for breakfast (imagine a bowl of all those delicious tomatoes, with a runny poached egg on top – yum!). Make a big pan, save some for later, and enjoy all the time you’re not spending in front of the stove.
Tuscan Chicken Skillet Recipe
SERVES: 4 PREP: 15 min. COOK: 30 min.
Ingredients
1 lb. chicken breast tenderloins;
1 onion, diced;
3 cloves garlic, minced;
12 oz. mushrooms, sliced;
½ cup sun-dried tomatoes, chopped;
15 oz. fire-roasted diced tomatoes;
1 tsp. oregano;
½ tsp. thyme;
Sea salt and freshly ground black pepper;
Tuscan Chicken preparation
Preparation
Melt some cooking fat in a large skillet placed over a medium-high heat.
Add the chicken and brown for 3 minutes on each side.
Remove chicken and set aside on a plate.
Add some more cooking fat to the skillet if necessary.
Add the sliced mushrooms in a single layer and brown for a few minutes per side. Remove from the pan and set aside.
Add the onion and cook until soft, about 4 minutes.
Add the garlic and sun-dried tomatoes and sauté for 2 to 3 minutes.
Stir in the diced tomatoes, oregano, thyme, and season with salt and pepper to taste.
Transfer the chicken back to the pan.
Cover and cook until the chicken is cooked through, about 10 to 12 minutes.
Return the mushrooms to the pan, combine well, adjust the seasoning if needed, and serve.
Original article and pictures take res.cloudinary.com site
A savory, satisfying meal that happens to be compliant to the Seventeen Day Diet. This version is great for those of us who think meat is the most important item on a menu.
If you want to sneak a little more vegetable into the family diet, try "Stuffed Peppers with Turkey and Veggies."
Ingredients
Directions
Preheat oven to 350 degrees F (175 degrees C).
After washing your peppers, cut off the top and remove the core, seeds and membranes. Dice the removed tops, after discarding the stem, and set aside. Wrap the bell peppers in aluminum foil and place in a baking dish. Bake 20-25 minutes, then remove from heat.
In a skillet over medium heat, saute onion and garlic in olive oil. until the onion becomes translucent (3-5 minutes). Remove from heat.
In a large bowl, combine sauted vegetables with all remaining ingredients and stir until combined. Fill the peppers with this mixture and place in baking dish*.
Cover loosly with foil and bake for 30 mintes, then remove foil and bake uncovered for 30 minutes more, or until turkey is cooked through.
*If your peppers do not want to stand upright, cut them down the middle and fill them as though they were little pepper boats. This also allows more of the meat to be exposed to direct heat, resulting in more of that lovely, crunchy meat crust.
Serving Size: Makes 4 abundant servings.
Original article and pictures take www.sparkpeople.com site
Here’s a recipe straight out of the kitchen of MaryPat C., a member of my private Facebook group. This soup is approved for all cycles of the 17 Day Diet. Enjoy!
Turkey Cilantro Enchilada Soup
Ingredients
1 large Vidalia onion, peeled and diced
4 garlic cloves, minced
8 celery stalks, chopped
2 pounds carrots, peeled and sliced
1 pound ground lean turkey
8 oz packet of Frontera Green Chili Enchilada Sauce with Roasted Tomatillo & Garlic by Rick Bayless (or any enchilada sauce of your choice)
2 32 oz boxes of Low or no-sodium chicken broth
1 bunch Cilantro, chopped for recipe and garnish
Greek or Plain Yogurt for garnish (optional)
Low or non-fat cheese
Olive oil
Salt and pepper, to taste
Directions
On medium heat, add a drizzle of olive oil into a large soup pot.
Add onions, garlic, celery and carrots and sauté until onions begin to soften. Add in ground turkey and continue cooking until meat is cooked through.
Add enchilada sauce to mixture and allow flavors to merry for a few minutes.
Add chicken broth and allow to simmer for 20 to 30 minutes, or until carrots are cooked through. At the very end, add a handful of chopped cilantro to soup and allow to simmer for a few minutes.
Season with salt and pepper according to your preference.
Garnish your bowl of soup with a dollop of Greek or plain yogurt, cheese and chopped cilantro.
Yields 6 servings
Approved for all cycles.
Photo courtesy of MaryPat C. Make sure you check out MaryPat’s Facebook Page for her business, Beyond Necessity Gifts.
Original article and pictures take 17ddblog.com site
Here’s a recipe I developed based on very limited information I read in someone’s Instagram post. These were delicious and can be eaten on any cycle of the 17 Day Diet. Even my boyfriend loved them!
Tuna Cakes with Lemon Dijon Sauce
Ingredients
2 4-oz cans of White Albacore Tuna, drained
1 Tablespoon Greek Yogurt
1 egg
2-3 Tablespoons Grated Parmesan Cheese
1 Tablespoon Fresh Chives, minced
Salt and Pepper, to taste
Dash Cayenne Pepper
Wedges from 1/2 Lemon (reserve other half for sauce recipe below)
Directions
Drain tuna fish and lightly flake. Mix all ingredients together until well blended. Make four patties. In frying pan, heat 2 tablespoons Olive Oil on medium heat. Brown each side for 10 minutes.
Serve on bed of lettuce along with the Lemon Dijon Sauce and lemon wedges.
Lemon Dijon Sauce
Ingredients
1/4 cup Plain Greek Yogurt
1 teaspoon Dijon Mustard
Zest from 1/2 Lemon
Juice of 1/2 Lemon
1 Tablespoon Fresh Chives, minced
Salt and Pepper, to taste
Dash Sweetener (optional)
Directions
Whisk together all ingredients. Serve over tuna cakes.
Yields 2 Servings
Original article and pictures take 17ddblog.com site
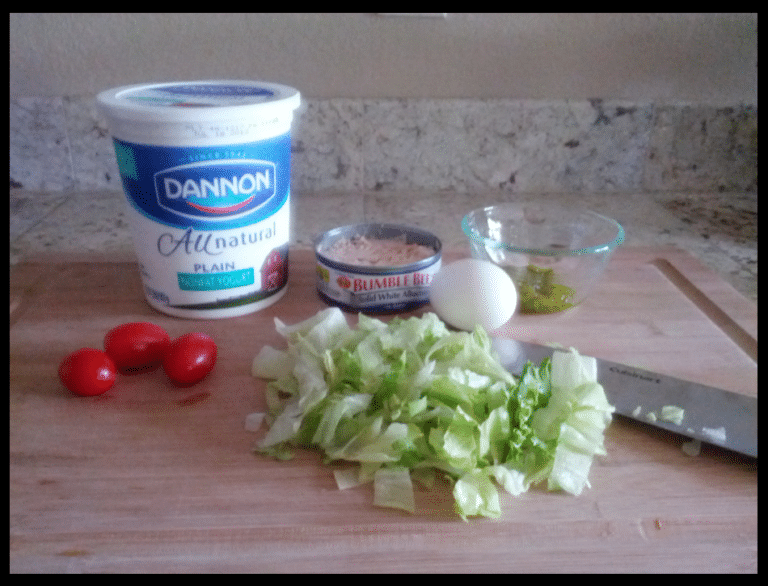
While my boyfriend made a tuna sandwich drenched in mayo, I opted for a more healthier version of the classic tuna and egg salad. Here are the ingredients I started with:
Ingredients:
1 Can Solid White Albacore Tuna (in water)
1 Tablespoon Sweet Pickle Relish
1 Heaping Tablespoon Fat Free Plain Yogurt (or more to taste)
1 Whole Egg, boiled
Handful favorite lettuce
Salt and Pepper, to taste
3-4 Cherry Tomatoes
Directions:
Drain tuna fish and add to bowl. Mix in sweet pickle relish and fat free plain yogurt. Cut up boiled egg and add to mixture. Salt and pepper to taste.
Top your favorite lettuce with the tuna salad. Garnish with 3-4 cherry tomatoes. Enjoy!
Approved for all cycles
Yields 1 Serving
Easy tuna and egg salad -- without mayo-- very delicious and healthy for you! 6 Ingredient Tuna and Egg Salad -- mayo free -- and healthy for you! Perfect Tuna and Egg Salad (mayo free and yummy too!)
The tomatoes add just the right burst of juicy flavor in between your bites.
Yummy mayo-free tuna and egg salad - made with yogurt for a healthier alternative Original article and pictures take 17ddblog.com site
LoveThisPic is a place for people to come and share inspiring pictures, quotes, DIYs, and many other types of photos. The user 'Timfly' has submitted the True Friendship picture/image you're currently viewing. You have probably seen the True Friendship photo on any of your favorite social networking sites, such as Facebook, Pinterest, Tumblr, Twitter, or even your personal website or blog. If you like the picture of True Friendship, and other photos & images on this website, please create an account and 'love' it. This will save the True Friendship to your account for easy access to it in the future. We hope you enjoy this True Friendship Pinterest/Facebook/Tumblr image and we hope you share it with your friends. Incoming search terms: Pictures of True Friendship, True Friendship Pinterest Pictures, True Friendship Facebook Images, True Friendship Photos for Tumblr.
Original article and pictures take www.lovethispic.com site
“I am so hungry on this diet” or “I haven’t lost any weight in Cycle 1″…
OK, there are two things wrong with these statements. 1- You should NEVER feel hungry on the 17 Day Diet and 2- It’s nearly impossible NOT to lose any weight on Cycle 1.
For those who may be feeling hungry or not losing weight on Cycle 1 or 2, ask yourself a few questions:
1. Am I drinking enough water?
Many times “hunger” really is our body telling us that we are dehydrated and need water.
2. Am I eating enough food on Cycles 1 and 2?
Remember, liberal amounts of vegetables and lean proteins are one of the basic rules of Cycles 1 and 2. If you feel hungry, eat more green, leafy veggies. If you’re not losing any weight during Cycle 1, increase your protein and vegetable intake (by a lot). However, remember to increase your water intake to accomodate the increase in fiber or you may find yourself constipated!
Case Study
I had a woman last year who emailed me asking why all the sudden her weight loss stopped in Cycle 1. I had her go back to her food journal to see what had changed. She discovered that because she wasn’t feeling all that hungry, she decreased the amount of protein and veggies. When she had done this, guess what happened? Her weight loss stopped. Your body gets used to not having enough calories and guess what it does? It holds onto every ounce of fat you have to keep you alive!
It’s important to eat enough calories to sustain you throughout your day, to allow your body to use this food for energy and to boost your metabolism.
Remember, liberal amounts of lean proteins and veggies in Cycles 1 and 2 for a healthier you!
Original article and pictures take 17ddblog.com site
Q: It seems like every week I hear about a new miracle diet. Which one is really the best?
-Rhonda W., Columbus, Ohio
This is one my favorite topics, and a question I grapple with every day in my office. To really determine the "best" diet, you have to consider your individual needs and goals. For people who are overweight, for instance, I generally recommend a low-carb or no-carb diet. But even that isn't always the best option. For someone with kidney disease, for example, a high-protein diet can be dangerous.
Don't Fall for Convenience
The common denominator of all "best" diets is a focus on whole foods, especially nutrient-dense vegetables. As one of my nutrition mentors liked to say, "Only eat food that would rot, but eat it before it does."
Much of the food (or as Michael Pollan, author of Food Rules and other books, would say, "food-like substances") found in the center aisles of conventional grocery stores has a scary-long shelf life. Food in a box is typically laden with toxic preservatives, and the inner lining of food cans generally contains BPA, a known endocrine disruptor.
When shopping for healthy options, it's important to remember that the more a food is marketed or advertised, the less wholesome it's likely to be. After all, you don't see a lot of television commercials for organic home sprouting kits, or corporate sponsorship of community gardens.
Don't fall for the lure of convenience. Taking care of yourself requires time and commitment, and it's the most important commitment you can make. I strongly recommend planning a week's worth of meals before you go shopping, and try to stick to the plan.
Go heavy on fresh produce, and make a yummy vegetable-based soup or stew and an interesting salad that will last for several servings. Center your evening meals around fresh-as-possible vegetables, and then add a little organic meat or fish. Or, if you prefer to avoid meat, pad your meals with plenty of protein-rich nuts, cheeses, eggs, or legumes.
How to Enjoy Meat
Humans are omnivores: Our digestive systems are designed to handle meat. This is where things can get tricky. Some people, especially those with type O blood, women who menstruate heavily, or athletes, feel much (much) better when they eat meat. However, there are way too many people on the planet for everyone to eat meat every day. We would wipe out our forests pasturing cows in 10 years if everyone aimed to get meat on every table, every night. It's therefore important not to lose sight of the planetary impact of our food choices.
A good compromise for meat eaters is to choose only organic or wild meat, fish, and poultry-if you have no idea where the slab of flesh came from, avoid it. And limit your intake to 2-5 servings per week.
Guide to Good Fats
Just as there are "good" proteins (organic, grass-fed) and "bad" proteins (corn-fed cows from factory farms), there are also "good" and "bad" fats. The good fats, which you should get regularly in your diet, are relatively unprocessed. Think olive oil, coconut oil, and organic butter. Avoid fats made in a lab such as margarine, usually crammed with hydrogen molecules so it won't go rancid. Hydrogenated fats assume an unnatural carbon-chain structure that renders the body's cell walls and tissues stiff and less resilient to stressors.
Polyunsaturated fish oils are readily absorbed in our small intestine and deliver healing nutrients, fuel, and building blocks for the nervous system. Saturated fats get tucked away in adipose tissue and the inner lining of arteries, and the only way to prevent atherosclerosis is to simultaneously eschew bad fats while feasting on plenty of nutrient-rich, naturally pigmented, vegetables. It's the pigments (chlorophyll, beta-carotene, lycopene, anthocyanins), fiber, and moisture content that make vegetables so awesome.
How to Deal with Carbs
Carbohydrates are the most difficult macronutrient for many of us to manage. Let's face it: We love carbs. Eating carbs gives us energy and pleasure. But we have to make smart choices.
"Good" carbs include whole grains (unbleached rice, barley, quinoa); organic root vegetables (potatoes, carrots, beets, rutabagas, turnips); oats (especially steel cut); and starchy legumes (black and kidney beans).
Heavily marketed white carbs that are mixed with sugar and packaged in boxes are designed to make you crave more. They're no good for your body, your mind, or your soul. They really do a number on your blood sugar, turning what should be a steady blood glucose level of 70-100 ng/mL into a wild roller-coaster ride. Do yourself and your family a huge favor and just swear off white sugar, white flour, and refined carbs. Within a few weeks, you'll notice that they taste hideously sweet and fake. And you'll also notice how much better you feel when you're not riding the blood sugar roller coaster.
Dr. Kane's Weight-Loss Advice
If you want to lose weight, you need to be in a state of ketosis while shedding pounds. This is when the body burns stored fat. KetoStix, which test your urine, are a great way to see how you're doing. If your morning urine turns the indicator strip a pink-burgundy color, you're tapping into your fat stores and heading in the right direction.
To reach and maintain a healthy weight, you ultimately need to figure out how many-and what kind of-carbs you can eat without packing back on the pounds. I never encourage patients to drink alcohol, but if you enjoy moderate social drinking and it doesn't put a barrel on your belly, alcohol may reasonably be your carb of choice. For those who aren't wheat intolerant, fresh, high-quality bread may fit the bill. No matter what you choose, the key is moderation and maintenance. If you find the scale creeping up again, cut it out.
Just remember: there is no such thing as an "essential carbohydrate," as opposed to "essential amino acids" (protein) and "essential fatty acids." We can live perfectly healthy lives without eating simple carbs (sugar, flours, alcohol). We cannot live without eating protein or fat (unless you have extra fat to burn, then it's fine to go on a ketogenic low- to no-fat diet until you reach a healthy weight).
Unless you're fabulously wealthy and can hire a full-time organic chef, you will need to put time into your food plan, every week. Just face that fact and schedule it like you schedule exercise, work, and fun-it will become part of your routine in no time.
Cooking Lessons
Need help putting together healthy, veggie-rich meals that are easy-to-make and delicious? Try these great websites:
You will need to put time into your food plan, every week. Just face that fact and schedule it like you schedule exercise, work, and fun.
Emily A. Kane, ND, LAc, has a private naturopathic practice in Juneau, Alaska, where she lives with her husband and daughter. She is the author of two books on health, including Managing Menopause Naturally. Visit her online at dremilykane.com.
Original article and pictures take www.betternutrition.com site
The term "lower abs" is actually a misnomer—your rectus abdominis muscle, or abdominal wall, actually covers your entire midsection and connects at your pelvis. Still, women (and men!) are constantly searching for exercises that will help eliminate that dreaded lower-belly pooch. (We got your attention, right?) And now the search is over! Most of these effective exercises target multiple abdominal muscles, so you'll maximize your belly burn with every rep.
A major perk of these effective lower-abs exercises: Focusing on the activation of your core is one of the keys to success with these abs toners (and any abdominal exercise). In fact, one study from Hull University found that people who mentally focused on their muscles and how they were moving experienced greater muscle activity, which can result in greater strength gains over time. So don't just "go through the motions." We've included "mind your muscle" tips with every exercise to help you maximize your results.
How it works: Do the prescribed number of sets and reps for each lower abs exercise consecutively, taking a short 45- to 60-second rest between sets. Perform the full lower-abs workout on 3 or 4 nonconsecutive days each week. Another option is to pick a few of your favorite moves and do them after a cardio session or add them into your regular strength-training routine.
This lower-abs exercise is a great way to wake up your core at the beginning of your workout or as a stand-alone exercise any time you want to squeeze in some extra abs work.
How to do it: Lie faceup with knees and hips bent 90 degrees, feet flexed. Extend arms and press both palms on top of thighs. Take a deep breath in, and as you exhale, brace abs in tight, pressing lower back against the floor as you push thighs into hands, pushing back against them (note: your legs should not move). Hold for 1 count and then release. Do up to 3 sets of 10 repetitions in a row.
Make it harder: As you exhale, lift your head and shoulders off the floor as you press thighs and palms together. Lower upper body back down to the floor as you inhale.
Mind your muscle tip: During the contraction, imagine you are "zipping" your muscles from your pelvic floor up to your belly button (drawing them in tight as if trying to squeeze into a pair of low-rise skinny jeans).
This Pilates-inspired move uses the same pressing action as the static press to deepen the engagement of your abdominals. The weight of your extended leg makes it more challenging.
How to do it: Lie on back and bend both knees into your chest, feet flexed. Interlace fingers on top of right thigh and extend left leg out parallel to the floor. Lift head and shoulders off the floor, curling up over the top of ribcage and looking at legs. Press palms against right thigh while tipping pelvis to bring right knee in toward chest (your hands should add resistance to your leg). Switch legs and press palms against the left thigh as right leg extends parallel to the floor. That's 1 rep. Do up to 3 sets of 10 repetitions in a row.
Make it harder: Keep both legs straight, pressing against the top of thigh as one leg pulls in, and then perform a scissoring action to switch sides.
Mind your muscle tip: As you push against your thigh, imagine you are pulling your leg into your chest with your abs. Focus on feeling the extra resistance in the abs, not your thighs or hip flexors.
This may be a small movement, but it works your lower abdominals in a big way!
How to do it: Sit with knees bent, feet flat on the ground. Lean back to prop upper body up on elbows (your back should remain lifted), palms facing down. Brace abs in tight and lift legs into a 90-degree angle (knees should be touching), toes pointed. Slowly bring legs over to the left (both hips should remain on the ground). Keeping the 90-degree angle with legs, lower legs and then lift them up to the right, as if you were tracing a letter "U" with your knees. That's 1 rep. Do 20 reps total, alternating sides each time.
Make it harder: The longer the lever, the harder this gets, so if you want more of a challenge, try extending your legs out farther (even straightening them completely).
Mind your muscle tip: Use your breathing to help deepen the abs work: Inhale as you sweep your legs over to one side and down, and then as you come up to the other side, exhale and visualize your belly button pressing all the way back to your spine.
This is another move that's much harder than it looks. You'll engage your abs and just about every other muscle in your body!
How to do it: Sit with your legs extended, feet flexed, hands just outside your hips with your fingertips facing your forward. Brace your abs in tight and press down through your arms to lift your hips a few inches off of the floor. Bend your knees slightly, keeping your heels on the ground. Inhale and scoop your abs in deeper towards your back, and as you exhale, fully extend your legs and try to push your hips slightly behind your shoulders. Hold for 1 count. Bend your knees and return hips under your shoulders to gently lower to the floor. That's one rep. Repeat up to 3 sets of 10 reps.
Make it harder: Instead of lowering your hips back down to the ground in between reps, try to keep them lifted off the floor the entire set.
Mind your muscle tip: Focus on lifting and moving your hips with your abs, only using your arms and legs for assistance.
This two-for-one Pilates move doubles your flat-belly results.
How to do it: Lie on back with arms at sides. Extend both legs straight up to the ceiling, crossing right leg over left, toes pointed. Brace abs in tight, inhale, and lower legs about 45 degrees. As you exhale, bring legs back into body and lift legs overhead on an angle (as if aiming to where the wall meets the ceiling behind you), lifting hips and back off the floor, pressing down with arms for support. Pause for 1 count, and then slowly roll through spine to lower hips and bring legs back to the starting position. That's 1 rep. Do up to 3 sets of 10 repetitions.
Make it easier: This move is tough, so if you can't lift your hips all the way off the floor, take your time to get stronger before attempting. Start by practicing drawing your legs up and over, and see if you can lift just a few inches off the mat and then immediately lower.
Mind your muscle tip: Your abs should remain constantly pulled in toward your back during the entire exercise. Use the visual of "zipping" your muscles in from your pelvis up to your belly button as you lift your legs overhead.
You'll feel every inch of this plank in your abs (along with your arms and shoulders too).
How to do it: Begin in an elbow plank position, hands clasped, with feet slightly wider than hip-width apart. Step left foot toward hands as you begin to lift hips up slightly, quickly taking another step in with right foot, lifting hips a little more. Step the left foot in again, lifting hips higher and then again with the right, so hips end lifted high in a pike position. Slowly inch back out, reversing the way you walked in, until you return to the starting plank pose. That's 1 rep. Do up to 3 sets of 5 reps.
Make it harder: Take larger steps in to raise your hips even higher in the pike position, and increase the number of reps per set from 5 to 10.
Mind your muscle tip: Your abs should be drawn in during this entire exercise. As you step your foot in, think of bracing your abs in deeper with each step.
Engage those hard-to-target obliques with this dynamic twist on the traditional plank.
How to do it: Begin in a full plank position with feet together. Bend right knee across to the left as you slide right foot up to the inside of left knee into a passé position (your hips should turn to the left and you'll pivot slightly on the ball of your left foot). Slide right leg back to starting position and then repeat to the left. That's 1 rep. Do up to 3 sets of 10 reps.
Mind your muscle tip: Imagine your abs are drawing your knee up and across your body. Pull your abs in tighter as you lift your leg.
How to do it: Lie faceup with knees bent and turned out, feet flexed, and heels pressed together. Inhale and lift head and shoulders off the floor, curling up over ribcage, looking at legs. Reach arms outside of hips off of the floor, palms facing down
As you exhale, press out through heels and extend legs 45 degrees, squeezing the backs of knees together. Inhale and bend heels back into body. That's 1 rep. Do up to 3 sets of 10 reps.
Make it harder: Extend your legs lower to the ground as you press out, or keep both legs extended and turned out, and then lift and lower them instead of bending and extending—just be sure your back stays down during the movement!
Mind your muscle tip: Focus your attention on your abs, forcing them to do most of the work to lift and lower your legs. Be sure to keep your lower back pressed into the floor the entire time.
Photos: Vanessa Rogers Photography
Original article and pictures take www.shape.com site
On today's episode of XHIT, fitness trainer Rebecca-Louise shows you the best ab exercises to flatten your stomach! Remember, always mix up your workout to see better results lose weight quickly! This ab workout will help you burn fat and get your six pack started for the summer! Follow along and let us know what you thought.
When it comes to overall fitness, both men and women focus on the rectus abdominis muscle group or as they are more commonly referred to, the “abs.” The goal with doing core exercises for this muscle group is the development of a six pack. In conjunction with these ab exercises, specific exercises are performed in order to develop the waist muscles or obliques as they are technically referred to. There are numerous exercises you can do to develop six pack abs but the following are the core exercises we recommend.
The bicycle exercise – this is probably one of the most effective exercises to perform for rapidly developing your abdominal muscles. To do this exercise, lie with your back pressed flat against the floor and place your hands on the sides of your head. Raise the knees until they are at a 45° angle to the floor and then mimic a bicycle pedaling motion. While pedaling you want to touch your left knee with your right elbow and your right knee to your left elbow in alternating fashion. Make sure that your breathing is even and relaxed throughout the exercise.
Leg raises using a Captain's Chair- this exercise also enables you to tone up your core and develop your abs quickly. It is also considered as the second most effective exercise for developing them. Additionally, there are a number of exercises you can perform using a Captain's Chair, which is a wall-mounted rack that has padded armrests and allows your legs to hang free off the ground. These are typically found in most fitness centers, gyms, and health clubs. You want to be careful not to arch your back or swing the legs when exercising. The key is to lift the legs while bending the knees until the lower legs form a 90° angle with the thighs.
Crunches with an exercise ball- exercise balls have always been considered an excellent workout tool, especially for ab crunches. This is considered a more effective crunching exercise because the abs do more work compared to ordinary crunches that you do lying on the floor. You position your lower back against the ball by lying on it. You can cross your arms at the chest or place them at the sides of your head. As you begin curling up be sure to keep the exercise ball stable.
Vertical leg crunches- another fairly effective ab exercise is the vertical leg crunch. Begin by lying flat on the floor and then lift your outstretched legs until they are positioned at a 90° angle to your torso. You can place your hands on the sides of the floor or lay them outstretched and flat on the floor for more support. You want to lift your shoulder blades off the floor as if you are attempting to touch your chest to your feet. Make sure that you keep the legs straight up in a fixed position while performing this exercise.
Original article and pictures take dietgirls.us site