Life goes on and I don't think I'll be reviving chowstalker.
Life goes on and I don't think I'll be reviving chowstalker.
If you are interested in aquiring all the code, data (and contacts, with their permission) for this once very popular "paleo-inspired" recipe sharing site, please contact me at "ron strilaeff at gmail . com" .
Original article and pictures take stalkerville.net site
I completely believe simple is always a winner! This recipe is featured in both my C1 Challenge (Spring 2017) and my weekly meal planning service, Simply17.
Enjoy!
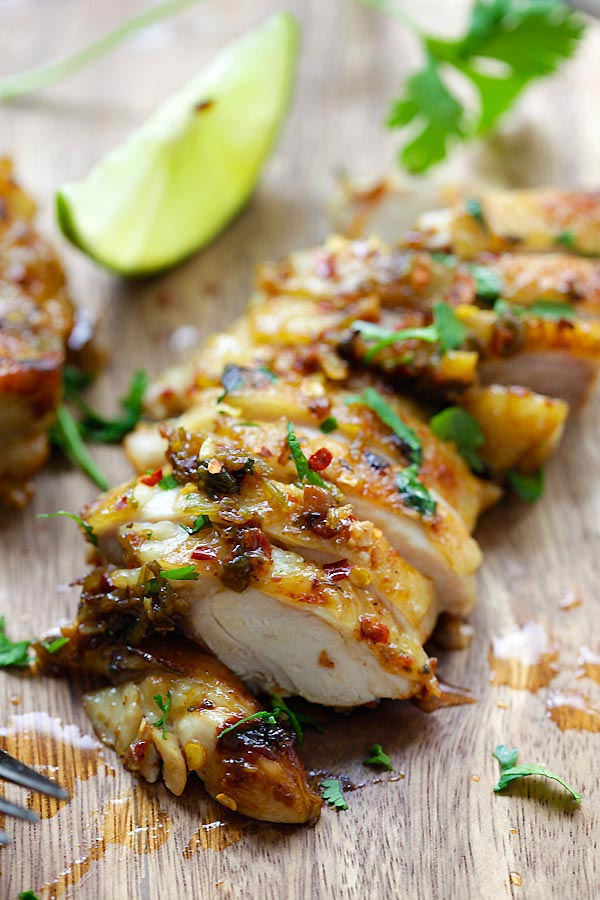
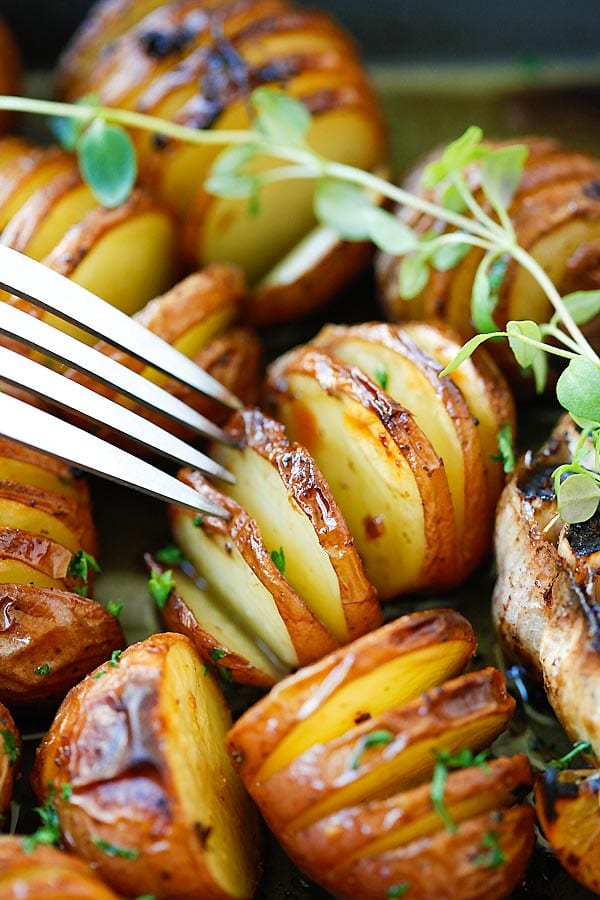
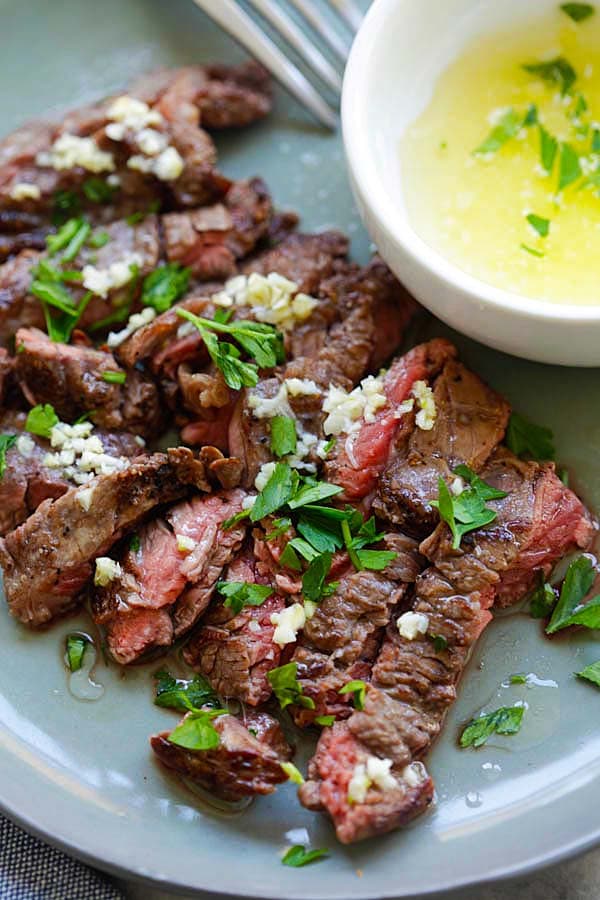
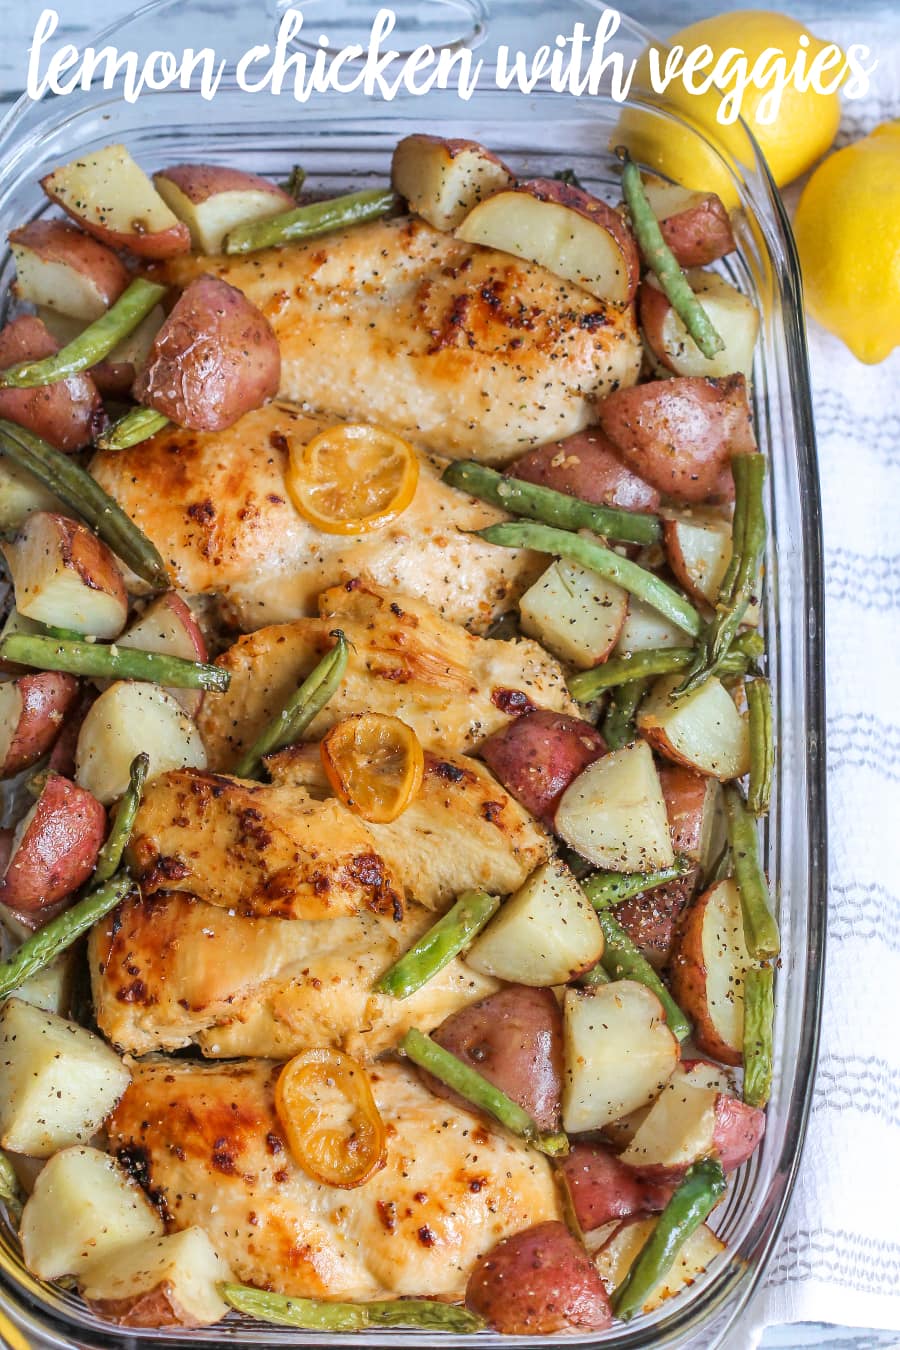
Lemony Herbed Chicken and Green Beans
Ingredients:
2 Tablespoons olive oil
1 lemon, zested and sliced
1 Tablespoon lemon juice (from part of the lemon)
2 cloves garlic, minced
1 teaspoon dried Rosemary
1 teaspoon dried Thyme
Salt and Pepper, to taste
4 boneless, skinless chicken breasts
1 pound fresh green beans, trimmed
Directions:
Preheat oven to 400 degrees F.
In a small bowl, whisk together 2 tablespoons olive oil, lemon juice, zest, garlic, rosemary, thyme, salt and pepper.
On a large baking sheet place chicken breasts and green beans and drizzle herb mixture over top. Toss gently to coat evenly. Place lemon slices over the top of chicken and green beans.
Roast in oven for 25 to 30 minutes, or until your chicken reaches an internal temperature of 165 degrees F and your green beans are crispy.
Yields 4 Servings
Approved for all cycles.
Photo courtesy of 17DD Blog Community Member, Cynthia C.
Original article and pictures take 17ddblog.com site
Happy Wednesday! I have another Tried and True recipe here to start off your morning. I bet you’re wondering what you should do for dinner. Well, wonder no more. This Lemon Chicken with Veggies dish is just begging for you to make it. It seems like there are millions of different ways to make chicken. This recipe is a new way for us! It’s simple, delicious, and perfect for dinner! It can easily be changed up too, so I’m going to try some other vegetables next time we make it.
I love being able to throw something together before the kids get home from school, then let it cook while we do homework. It’s ready and perfect just in time for dinner. No crazy kids running around the kitchen at 5 o’clock while you’re trying to figure out what to make. Try it out and I bet you’ll love how smoothly your dinner prep (or as I like to call it “witching hour”) goes.
We love all the hearty veggies with this chicken and feel like you get an entire meal with this one recipe. Be sure to try it out and let us know how it goes.
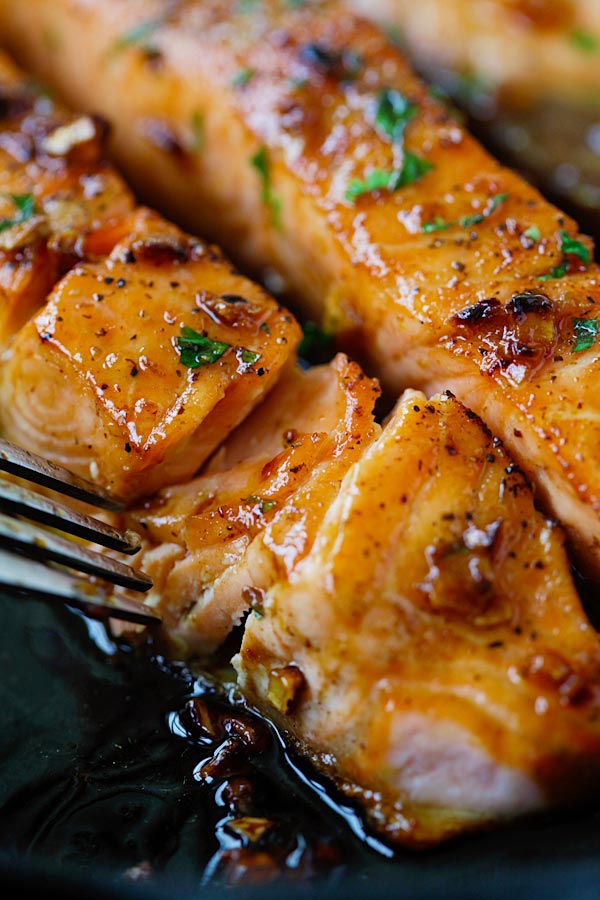
Lemon and Herb Tilapia Baked Tilapia. Arthur Kwiatkowski / Getty Images
Tilapia is a mild white fish. The average tilapia fillet weighs about 4 ounces, with only around 109 calories and 22 grams of protein. It's an excellent choice for the weight-conscious, and it's low in mercury.
Tilapia fillets are thin and cook quickly. The simple preparation steps and quick baking time make this tilapia recipe perfect for a busy evening. The recipe takes no more than 30 minutes, start to finish!
The butter, lemon, and herbs flavor the fish beautifully, and it makes a fabulous meal with hot cooked rice or a baked potato. I love Brussels sprouts or broccoli with fish, but any steamed vegetable or salad would make a good side dish. You'll find some cooking tips and substitution ideas below the recipe.
Unlike many here-today-gone-tomorrow fitness crazes, kettlebell workouts are a time-honored technique that's just finally getting the attention it deserves. Since the weight isn't evenly distributed, using a cast-iron kettlebell forces your stabilizer muscles to work harder. As a result, you'll carve your core, sculpt your shoulders and back, and tone your butt and arms, as well as build power and boost endurance.
As for its calorie-burning capability, the average kettlebell workout melts away 20 calories a minute, says a recent study from the American Council on Exercise. That’s 300 calories gone in just 15 minutes!
Try this total-body circuit from kettlebell expert and celebrity trainer Paul Katami, star of the Kettlebell Konnect DVD. You can do it at home or in the gym to fry fat and tighten up from head to toe.
Workout details: Do a quick dynamic warm-up (1-2 minutes of jumping rope, jacks, or high-knee marches), and then do 1 set of the prescribed number of reps (or time) for each exercise. Move quickly from one move to the next with little rest in between. After you've finished the last exercise, rest 1-2 minutes, and then repeat the entire circuit 1 more time for a 15-minute, fat-blasting workout. If you're up for a challenge, complete 4 circuits total for a full 30-minute session.
You’ll need: A kettlebell (5-15 lbs, depending on your level)
(Never worked with a kettlebell before? Read these helpful tips before getting started.)
A swing squat isn't like regular squats, Katami says. "It's a hybrid between a squat and a deadlift. A swing is a skill exercise that requires power and momentum."
How to do it: Stand with your feet together, holding the kettlebell in front of your thighs. Step out with your right foot, push your hips back, and lower into a squat. Maintain the natural arch in your spine as you swing the kettlebell between your legs. Swing the bell up in front of your chest (arms stay extended) and quickly step your right foot back into your left. Do this movement as many times as you can with good form for 30 seconds with your right leg, and then 30 seconds with the left.
"The core comes alive on this one!" Katami says. "It's a combo of a basic squat and a windmill of sorts."
How to do it: Start standing, feet together, with the bell in your right hand in ‘rack’ position (the bell should rest on the back of your hand with the handle running diagonally across your palm). Step out to the left and lower into a squat as you press the bell to ceiling and reach your left hand down between your feet. Try to create a straight line between both hands with your arms, and then slowly return to start position. Perform the movement for 30 seconds on each side (60 seconds total) with no rest in between.
Training tip: "Rotation through the midsection should be the primary focus," Katami says. "Always track your eyes with the bell above you, watching the bell the whole time, and carefully return to the rack position at the start."
Build strength in your biceps and forearms while you shape up your lower body with this compound exercise.
How to do it: Start with feet together, holding the bell in your left hand. Step back with your left leg, lower into a lunge, and perform a biceps curl (bell bottom down). Immediately return to the starting position. Do 12-15 reps in a row on each side.
This power move incorporates the entire body, but it really engages your abs during the press.
How to do it: Stand with your feet hip-width apart, with the bell in your left hand in rack position, right hand tucked under your left palm. Push your hips back and bend your knees to lower into a squat, and then quickly explode upward, pressing the bell overhead, reaching your right arm down by your side. Return to rack position and repeat. Perform the movement for 30 seconds on each side (60 seconds total) with no rest in between.
Get ready to work it! Those burpees you love to hate are taken to a whole new level with this combo move.
How to do it: Hold the kettlebell in your right hand and stand with your feet slightly wider than hip-width apart. To perform a basic high pull, lower into a squat, swinging the bell through your legs, and as you stand, pull the bell back, bending your elbow [as shown in the top right photo]. Immediately lower into a squat and perform a burpee on top of the bell [bottom photo]. Return to start and repeat. Perform the movement for 30 seconds on each side (60 seconds total) with no rest in between.
Training tip: "The bell hand in the burpee takes very little weight," Katami says. So it's almost like a single-arm burpee on the free hand. "Never press directly into the bell in the pushup position," he adds.
Challenge your entire core (and more!) with this total-body exercise that's great for building core and shoulder stability.
How to do it: Start in an elbow plank position, with the bell just behind your right elbow. Step one hand in at a time to press up into full pushup position. Reach your right hand under, grab the bell, and drag it to the other side. Lower back down into modified plank one arm at a time. That's one rep. Complete 12 reps, alternating sides each time (6 reps per side).
Photos by: Vanessa Rogers Photography
Original article and pictures take www.shape.com site
When starting any type of diet, it’s crucial to keep track of several things. For Cycle 1 of the 17 Day Diet, it’s all about detox and rapid weight loss. It’s important to keep tabs on several key factors during this phase to help you gain momentum for starting Cycle 2.
1. Food Intake — If you keep track of the types of food you are eating as well as how much, you will become more in tune with what you’re feeding your body and may lose weight as a result. Keeping yourself fully aware not only keeps you in check during your diet, but may also help you understand why you may plateau at certain points during your diet.
I had a blog reader who experienced a plateau during Cycle 1. She didn’t quite understand why she was no longer losing weight until I asked her to review her food journal. Because she had recorded every morsel of food, she discovered she wasn’t eating enough protein and vegetables and her body was literally starving! A quick correction in her food intake, and losing weight was back in full gear.
2. Weight — Weekly or daily weigh-ins are equally important. Keeping track of your weight in sync with your food journal will help you understand how certain foods affect your weight. Remember it’s important to weigh yourself at the same time during the day as your weight fluctuates all day long. For instance, if you decide to weigh yourself daily, weigh each morning at 7am before you’ve had anything to eat and drink. This will produce consistent and more accurate results.
3. Inches — Dieting is not just about the scale. Some people don’t see a significant drop in weight, but their clothes start fitting better. This is because you’re losing inches! For those who exercise and participate in strength training routines may actually see an increase in weight– muscle weighs more than fat! In fact, you may lose fat, but gain muscle. Pay attention to your inches lost. Consider keeping track of the size of your thighs, waist and upper arms. If the scale is not moving, but the size of your thighs are getting smaller, you will have the motivation to keep going. So make sure you’re keeping track of the size of your body!
4. Emotions — For many of us, we are overweight because we are emotional eaters. We eat when we’re happy. We eat when we’re sad. Heck, we eat when we’re bored! Keeping track of your emotions as you reach for food may help you become more aware of how you’re feeling and what you can do to prevent yourself from eating based on emotions alone. Remember, we’re not “feeling” our food. Food is solely for nutrition and energy for our body. Recognizing our emotions when turning to food for comfort is the first step in correcting the issue and seeking help if needed.
Original article and pictures take 17ddblog.com site
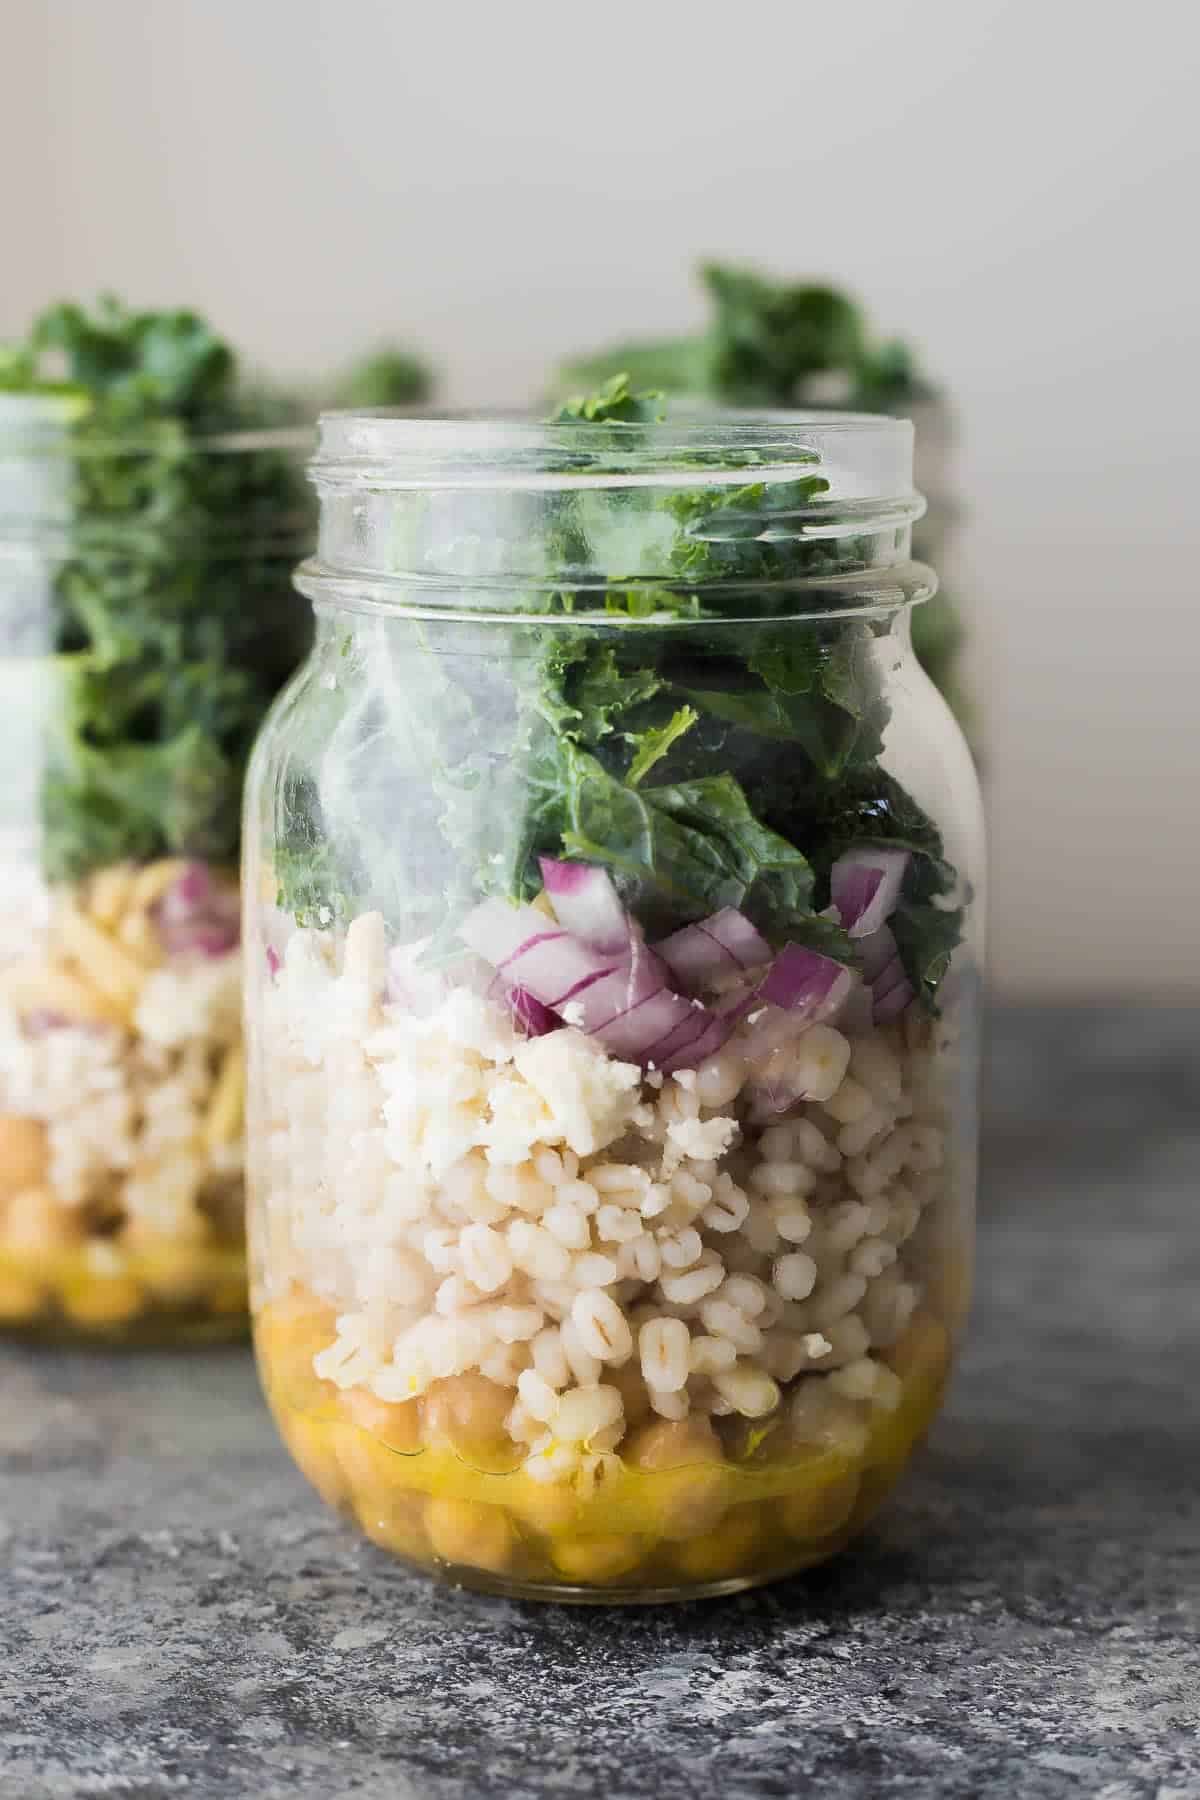
Kale Barley Salad with Feta and a Honey-Lemon Vinaigrette (Video)
This kale barley salad has it all: crunchy sunflower seeds, creamy avocado, salty feta cheese, chickpeas and red onions, and is tossed in a tangy honey and lemon vinaigrette. Perfect for a week-day lunch!
Recipe updated 09/26/2017 to include instructions for using this recipe as a meal prep lunch.
I know that it has already been ‘back to school’ for most kids, but it’s about to be ‘back to school’ for me!
Except that my school is more like work. It doesn’t end at 3, that’s for sure. There were often long days, homework and work on week-ends. That’s because I’m doing my PhD.
I am 4 and a half years in {!}, meaning that I am hopefully within a year of finishing. There are definitely things that need to happen in this year, the least of which is writing my thesis {!!} and having my defense {!!!}. Then you have to call me doctor, or I won’t answer you
So yes…It’s time to roll up my sleeves, dust off my brain, and say hi to science again.
Besides saying good-bye to my {somewhat} relaxing morning routine with Kai, I am going to have to start packing a lunch again! And as much as I like peanut butter, PB sandwiches are a bit depressing.
That’s how this kale barley salad was inspired. It is healthy, convenient, packed with goodies. It will keep in your fridge for a few days {minus the avocado} so you can prep up a big batch and eat it for several days.
My favorite part about this kale barley salad {besides the flavor!} is the different textures. Are you a texture eater? I am! This salad has the leafy kale, creamy avocado, crunchy sunflower seeds, smooth, chewy barley. I love all the contrasting textures.
The base of the salad is kale. Maybe you are on the kale bandwagon, maybe not. I have found that the secret to eating raw kale salads is to marinate your kale in the dressing for at least 30 minutes before eating it. It also helps to give it a bit of a massage when you wash it.
I added pearl barley to the salad to give it some ‘staying power’. I hate it when I eat my lunch and am hungry an hour later! Plus I absolutely adore the texture of the pearl barley….so smooth and chewy and slightly nutty in flavor.
To add some protein to this kale barley salad, I threw in some chickpeas, feta and sunflower seeds. We ate this salad for dinner one night and Ben also added some chicken breast, but honestly, I was good with how it is.
Then…the vinaigrette! It is a tangy white wine vinegar, honey and lemon vinaigrette. Super simple, and works perfectly with the kale, feta, chickpeas, sunflower seeds, avocado.
It all comes together as a slightly lemony, sorta tangy, all-round delicious, fresh, healthy, tasty salad.
Long before I started the 17 Day Diet, I was losing weight on my own without following a “diet”.
I was eating whatever I wanted to, but cutting my portions in half.
I lost weight.
It took some time to lose the weight, but one of the reasons I was successful (besides limiting portions) was the fact that I kept track of everything I ate.
I also had a daily weigh-in log so I could review past weeks to see how I was doing, to check on food intake and figure out why I was at a plateau or why I was gaining weight.
Fast forward a few years and I started my 17 Day Diet Blog. I used these same food journals and weigh-in logs that I had once created to keep track of my progress…and it still worked!
I have a lot of free tools on this blog to help you along the way. Here are just a few:
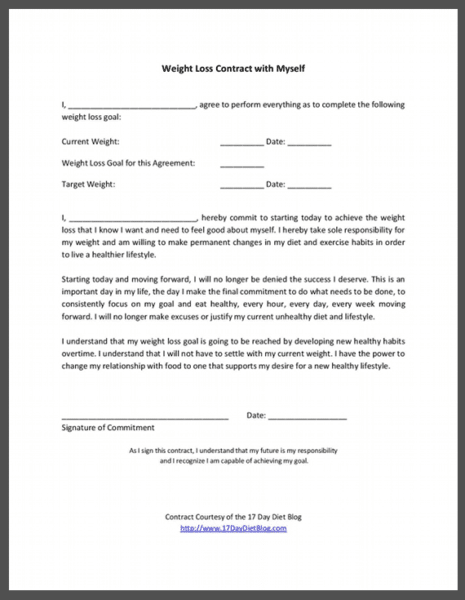
Weight Loss Contract To Myself for the 17 Day Diet
Now, these free tools should work just fine. However, if you’re looking for something a bit more, you may browse my store for more in-depth tools such as planned menus and recipes.
If you’re on the go like me, you’ll find all of my meal planning kits are mobile-friendly. All the food journals and daily weight trackers are fillable PDF forms that you can save on your computer or your tablet and use them daily all while saving your entries for future use and review.
I had one blog reader email me some time ago. She could not understand why she was not losing weight on Cycle 1 anymore.
Luckily, she had kept track of her exact food intake on the helpful food journals that come with Simple N’ Lean 17 that she had purchased here on the blog. She was to review her logs for the last week to see where her diet had changed.
Sure enough, she had decreased her protein intake because she simply was not hungry and her body decided it would hold on to the food she was feeding it, and as a result she stopped losing weight. Because she had been keeping track of her food intake using the food journals, she was able to quickly correct the problem and she began seeing results again.
Original article and pictures take 17ddblog.com site
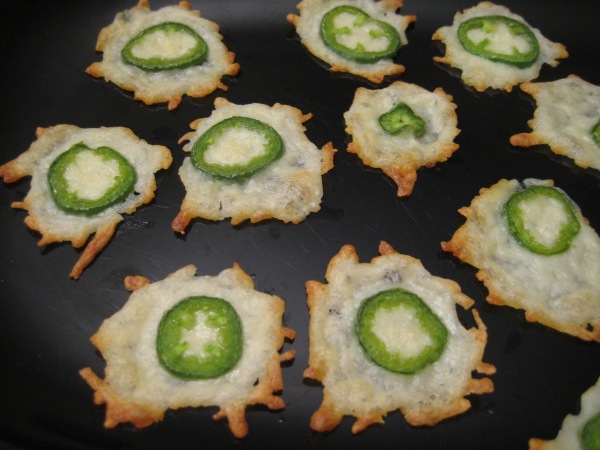
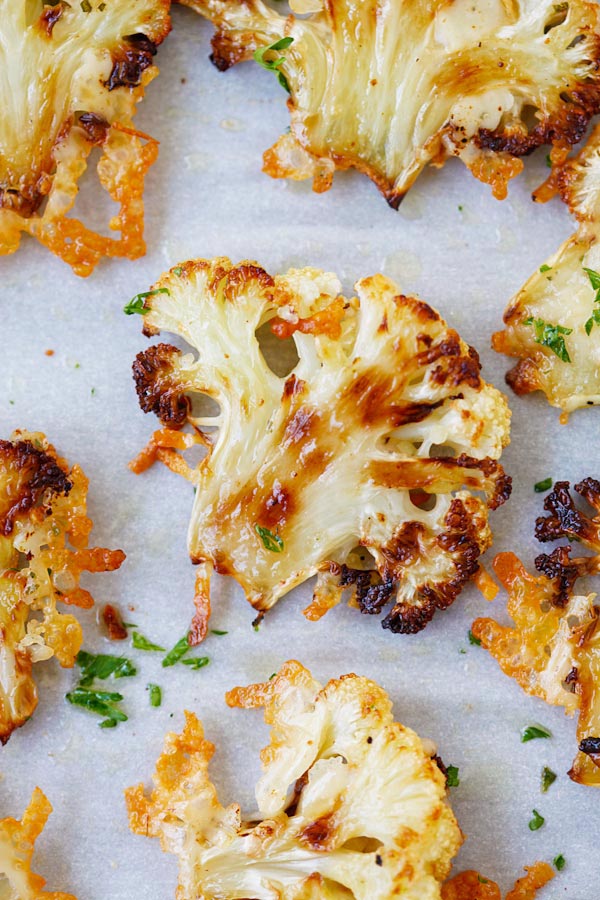
Jack Snacks Baked only 10 minutes (chewy) Baked 12 minutes (crisper)
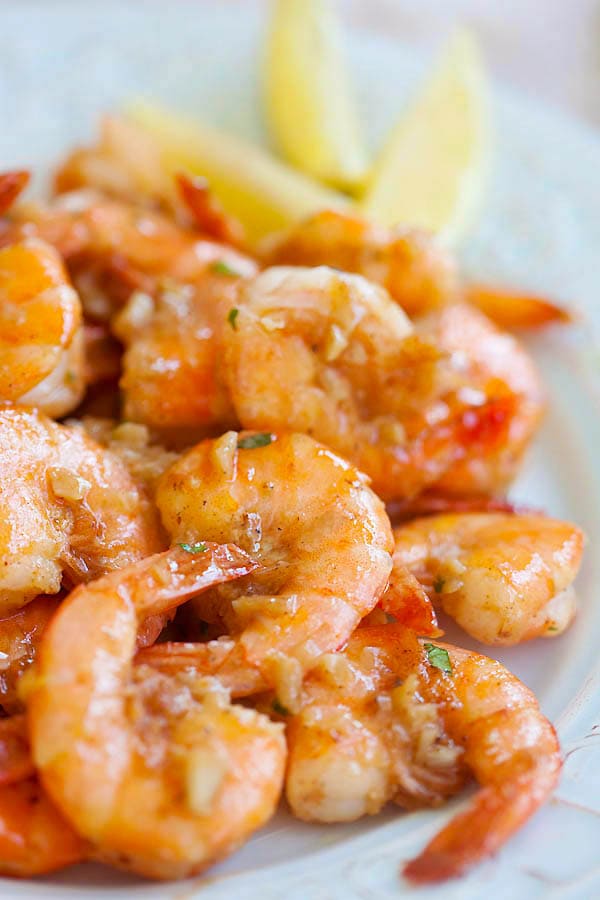
Starting a low-carb diet? Bet you’re wondering what YOU can snack on when the rest of the family is enjoying verboten foods. Well this recipe, if you can call it a recipe, is one solution. It’s suitable for Atkins Induction Phase, Keto diets and even Primal followers that eat occasional cheese. Takes just minutes to make and bake! This is now my #1 recipe in popularity, having well over 30,000,000 fans on Facebook now, blowing my Lebanese Baked Chicken (my former #1 recipe) right out of the water.
And if you seed the jalapeno, like I did, these were not even all that hot (I don’t like real hot/spicy foods). Leave the seeds in if you like to spice things up! These are delicious and so low-cal/low-carb you could eat the entire batch if you were so inclined! The hubs and I split this batch equally and we both loved these! Now, to be quite honest, I’ve also just melted plain old pepper-jack cheese before, but these really are better for some reason. Maybe the cheese is better; maybe the fresh pepper is just better. All I know is these are much better than just melting jack cheese! Some have asked, and if you try to save some and reheat, you better really watch them closely, as they are inclined to burn when reheated.
More delicious low-carb recipes can be at your fingertips with your very own set of Jennifer Eloff and friends’ best-selling cookbooks LOW CARBING AMONG FRIENDS. She has collaborated with famous low-carb Chef George Stella and several other talented cooks to bring you a wealth of delicious recipes you are going to want to try. Even a few of my recipes are in each of the 5 volumes! Order your set TODAY! (also available individually) from Amazon or: http://amongfriends.us/order.php
DISCLAIMER: By personal choice, I do not receive money for this book promotion nor for the inclusion of my recipes therein. I do so merely because they are GREAT cookbooks any low-carb cook would be proud to add to their cookbook collection.
INGREDIENTS:
1 cup shredded Monterrey Jack cheese
1 medium fresh jalapeno, sliced real thin
DIRECTIONS: Preheat oven to 350º. Place a sheet of parchment paper on a metal cookie sheet. DO NOT use a silicone/silpat sheet, waxed paper or foil (unless it’s the special non-stick foil) to bake these or they will not cook properly. Using a tablespoon, scoop up 1 T. of cheese and make a small pile on the parchment. Press it slightly flat. Repeat 15 more times. Place a slice of jalapeno on top of each pile. Pop into 350º oven for about 10-12 minutes. I would recommend browning them a wee bit more than shown in the photo for a firmer snack to serve at parties. These are somewhat pliable if under browned. Allow them to completely cool and fully firm up before removing from the pan for best results.
NUTRITIONAL INFO: Makes 16, each contains:
25.5 calories
2.13 g fat
0.10 g carbs, 0.02 g fiber, 0.08 g NET CARBS
1.63 g protein
60 mg sodium
Original article and pictures take secure.gravatar.com site
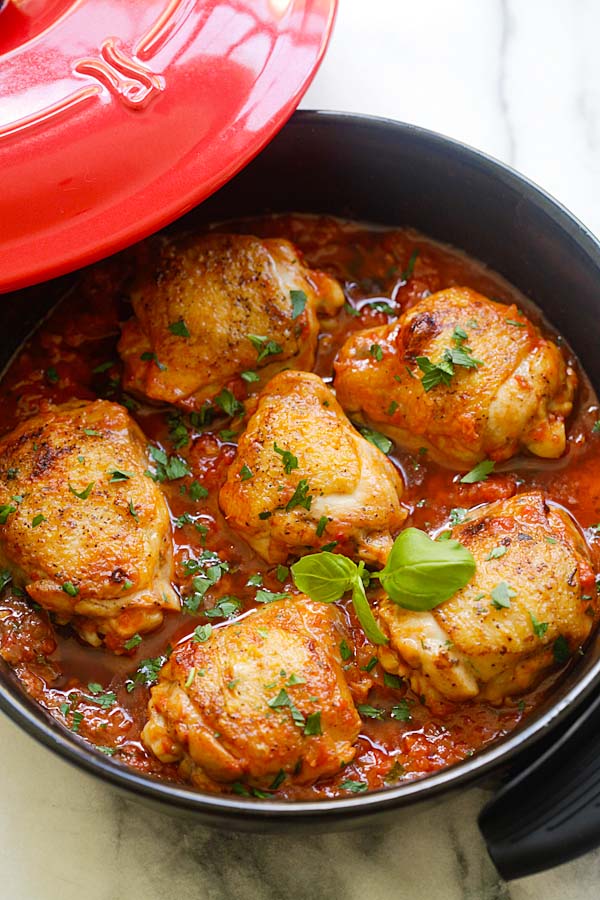
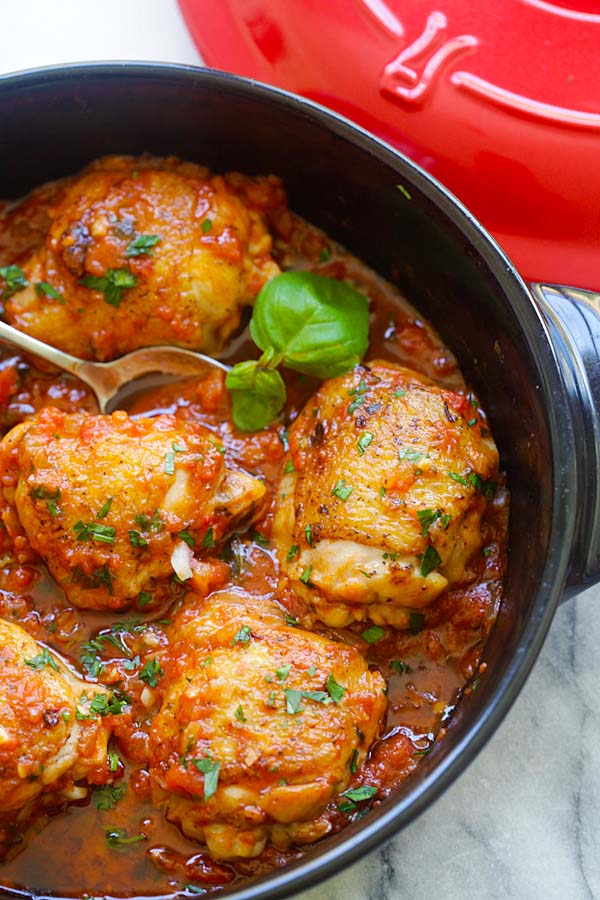
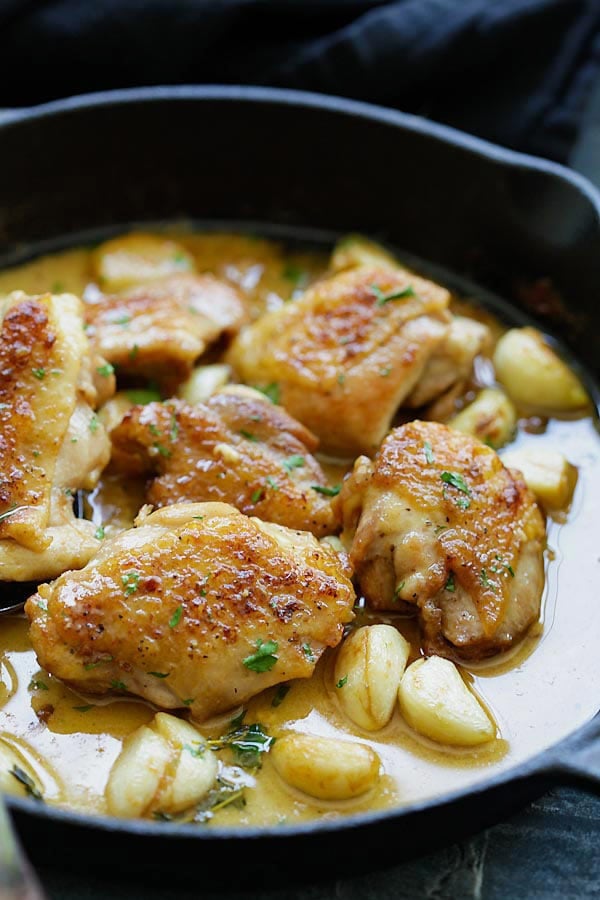
Italian Braised Chicken – delicious one-pot braised chicken recipe with tomato and basil sauce. Amazing weeknight meal for the family!
This time of year when the leaves fall and I start to feel the chills in the air, it’s all about braising, stewing, and slow-cooking in my kitchen. There is just something cozy about Fall cooking: the mouthwatering aromas wafting in the kitchen and the comforting foods that set our stomach rumbling. I love Fall.
One of my favorite dishes to make is this inviting Italian braised chicken with just a few simple ingredients. It’s extremely easy to make and the result is absolutely hearty and delicious. It’s best served with a simple pasta dish or even rice, and it’s a perfect family-friendly weeknight dinner that feeds the entire family.
When it comes to making Fall and Winter dishes, I rely on my Ceramcor Xtrema Ceramic Braiser. I came to know about Ceramor Xtrema Cookware a couple of years ago and it has become one of my favorite all-in-one cooking utensils for many of my recipes. I love it that it’s versatile. I use it as a skillet, braiser and baker.
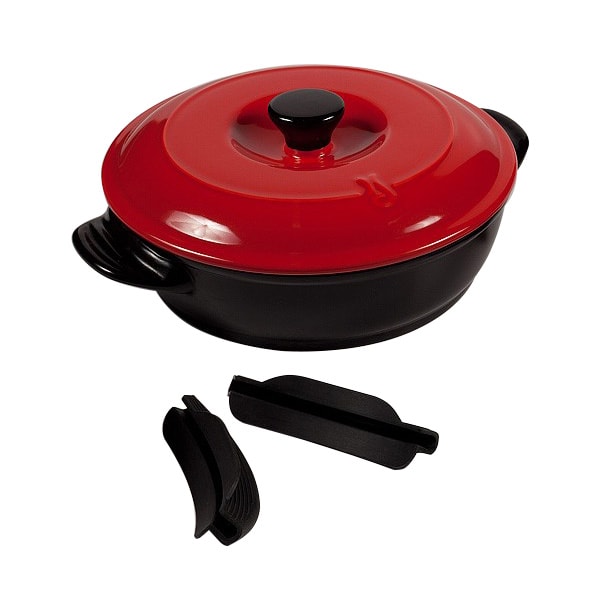
For this Italian braised chicken recipe, first I browned the chicken thighs on the braiser, then I stewed it on low heat. The end result is tender, juicy, and moist chicken in one pot. The silicon pot holders are especially useful to keep my hands safe from the heat of the pot, so I don’t even need my oven mitt. The Xtrema braiser is also oven safe, making it an amazing utensil for casserole recipes.
The great news is I have a giveaway of this amazing product, and you can enter to win every day (US only). You can also click here and buy it online. Happy cooking!
This is a sponsored conversation written by me on behalf of Ceramcor. The opinions and text are all mine.
Italian Braised Chicken – delicious one-pot braised chicken recipe with tomato and basil sauce. Amazing weeknight meal for the family!
For this Italian braised chicken recipe, first I browned the chicken thighs on the braiser, then I stewed it on low heat. The end result is tender, juicy, and moist chicken in one pot. The silicon pot holders are especially useful to keep my hands safe from the heat of the pot, so I don’t even need my oven mitt. The Xtrema braiser is also oven safe, making it an amazing utensil for casserole recipes.
1 tablespoon chopped Italian parsley, for garnishing
Utensil:
Method:
Rinse the chicken thighs with water and pat dry with paper towels. Season with salt and black pepper on both sides of the chicken. Puree the tomatoes in a food processor.
Heat up the Xtreme braiser on high heat. When it’s fully heated, arrange the chicken thighs, skin side down first. Brown both sides of the chicken. Remove the chicken from the braiser, save the juice that seeps out from the chicken.
Turn the heat to medium and add the olive oil to the braiser. Saute the onion and garlic, for a couple of minutes or until the diced onion becomes soft. Add the tomato puree and basil, stir to combine well. Transfer the chicken and the juice into the braiser, cover the braiser with its lid and simmer on low heat, for about 15-20 minutes, or until the chicken becomes tender. Add salt and brown sugar, stir to combine well. Garnish with chopped parsley and serve immediately.
Original article and pictures take rasamalaysia.com site
It’s Been a Peanut Butter Bacon Burger Kind of Day!
Have you ever had one of those really stressful days when all you can think about is the tension head ache you can’t get rid of and counting down the minutes until the little hand on the clock lands on 5?
That was me earlier this week — I had a busy day at the office, dealing with clients and bosses along with the killer headache from hell!
I affectionately call these Peanut Butter Bacon Burger days!
Emotional eating has been an issue for me. You eat when you’re happy, you eat when you’re upset, you eat when you’re bored. Sound familiar?


/baked-tilapia-183384703-56ffa4933df78c7d9e54ba76.jpg)